How to create «minecraft» maps with worldpainter
Содержание:
- Change Other Map Settings
- Walls
- How do I change what Minecraft does when I use Populate? How do I get rid of all the small water and lava lakes?
- Les bases de World Painter
- Random Variation
- How do I add custom blocks from mods to the map?
- What is WorldPainter?
- Расположение элементов
- Is Multiplayer supported? How do I put the map on a Minecraft server?
- Water and Lava
- Applying a Terrain Type Directly
- Create a New Minecraft World
- Types of Layers in WorldPainter
- Export the Map as a Minecraft Map
- Layer Colouring
- History[]
- Reduce WorldPainter’s memory usage
- How do I edit existing Minecraft maps?
- Loading a Height Map
- Change Brush Size and Texture
- Mixing Populate with other layers
Change Other Map Settings
If you are feeling extra creative, you can test out the additional map options located under the menu bar at the top of the WorldPainter program. These tools have more to do with the properties of the Minecraft map, such as editing the dimensional properties, enabling and disabling the max far view distance and rotating the map. Here is the full list of options:
- Edit the properties of this dimension
- Raise or lower the entire map
- Rotate the entire map by quarter turns
- Add or remove tiles
- Move the view to the spawn point
- Move the view to the origin
- Enable or disable the grid
- Enable or disable height contours
- Enable or disable image overlay
- Enable or disable showing the maximum (far view) distance
- Enable or disable showing the five minute, one day and one day and one night walking distances
- Rotate the direction the light comes from anticlockwise
- Rotate the direction the light comes from clockwise
Editing the properties of the dimension really allows user to fully customize their Minecraft map. You can have a border of water, lava, or even a void to keep players trapped in. You can choose to have underground caverns everywhere, and even to have them break the surface! Depending on the type of map you are making, this tool can really help you set the theme.
Walls
The settings described so far will result in perfectly flat walls that meet the floors and ceilings at 90 degree angles (or whatever angle the floor or ceiling is at). If you want smoother transitions of floors to walls and walls to ceilings you can do so with the bottom width and top width settings. These determine how far, in blocks, the wall will come ‘into’ the cave at the bottom and top of the wall, respectively. From there, the wall will make a quarter circular turn upwards or downwards, so the height of the section that comes into the cave will be the same as the width (unless the cave is not high enough for that of course).
If you want a square cave or tunnel, set these to 0. If you want a perfectly circular cave or tunnel, set them to half the cave height (the difference between the floor and ceiling levels), and make sure to paint the layer at the correct width by setting the brush radius to the same value.
How do I change what Minecraft does when I use Populate? How do I get rid of all the small water and lava lakes?
The small water and lava lakes aren’t created by WorldPainter, they are created by Minecraft when you use the Populate layer, or enable the «allow Minecraft to populate the entire terrain» option. WorldPainter has no control over what Minecraft does when it populates a chunk, at least not for the Default and Large Biomes world types. All it can do is tell it to populate the chunk, or not, for each individual chunk. If Minecraft populates a chunk it will add underground resources, vegetation, trees, small water and lava lakes, snow and ice, villages, ravines, strongholds and abandoned mines. It will not generate caves. For more details about the proper use of the Populate layer, see the Populate page.
If you don’t want the small water and lava lakes, you do have one option: you can set the world type to Superflat, and then use the Superflat preset to configure exactly what you want Minecraft to do during the population step. For more details about this technique, see this YouTube video by Fornan II.
You should also consider whether you need Populate, as WorldPainter has its own layers for almost everything. The only thing that WorldPainter can’t generate itself is structures (mines, villages, etc.). By default the Resources layer is «on everywhere», so WorldPainter already generates underground resources. You can use the other layers to add things like Deciduous or Pine forests, snow and ice, underground Caverns and Chasms, etc.
Les bases de World Painter
Malgré l’interface accessible à tous, comptez tout de même une bonne heure avant de prendre connaissance des bases du logiciel : le résultat final variera bien sûr selon la minutie dont vous avez fait preuve.
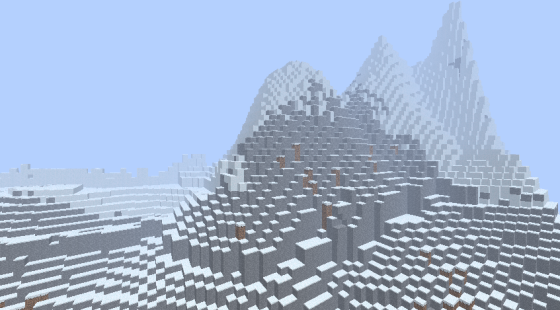 Une chaine de montagne générée par World Painter
Si vous désirez percer dans l’originalité, vous pouvez vous servir des fonctionnalités du logiciel pour créer des volcans, des monts habitables, des pyramides glacées… C’est à vous de faire marcher votre imagination et de fixer vos limites !
Le programme est très simple d’utilisation. Les boutons à gauche servent a sélectionner l’outil, les clics gauche et droit à utiliser les outils (le bouton droit ayant la fonction inverse du gauche, pour surélever ou creuser le terrain)
La fonction « Load » (charger) et « Save »(sauvegarder) utilisent le format WorldPainter. Ce format pourra changer et l’avenir et ne plus être compatible avec vos maps actuelles
La fonction « Export » exporte les maps au format Minecraft dans le dossier spécifié. Elles peuvent être exportés directement dans le dossier de sauvegarde ou dans un autre emplacement.
20 façon d’utiliser le logiciel Worldpainter.
Random Variation
The settings described above will result in completely flat floors and ceilings, and/or floors and ceilings that exactly follow or reflect the terrain. If you want more variation you can use the smoothness settings for both floor and ceiling to add some random noise:
- The range setting determines the height of the random variations. 0 means no variation at all (in which case the other settings aren’t applicable and therefore disabled). If you set this higher than 0 the floor or ceiling will have random «hills» with the configured number of blocks difference between the lowest troughs and highest peaks. Note that the displacement is both up and down, centred around the original floor or ceiling height.
- The scale setting determines the horizontal size of the «hills». If you set this lower the peaks will be narrower, sharper and closer together, if you set it higher they will be wider and further apart.
- The roughness setting determines how chaotic or rough the «hills» are. At 0 they are smooth and very similar to WorldPainter’s default terrain. At higher levels more and more smaller detail is introduced to make the terrain more rough or chaotic.
How do I add custom blocks from mods to the map?
WorldPainter supports custom mod blocks with non-standard ID’s (even ID’s between 255 and 4096). Note: for block ID’s above 255 you have to enable «extended block IDs», either on the New World screen, or afterwards from the Edit menu.
We can’t help you with which block ID’s to use, you’ll have to find that out from the mod website or ask the authors or other users. Once you know the block ID to use there are four ways of adding custom blocks to the world:
- Use one of the Custom terrain types (one of the buttons with a question mark on them). This will set the surface layer of the world to the custom block wherever you paint that terrain.
- Create a Custom Underground Pockets layer (from the + button on the Layers panel). This will create random underground pockets of the material wherever you paint the layer. Good for things like underground ores or pockets of oil, etc.
- Create a Custom Ground Cover layer. This will create a layer of the material on top of the surface. Make it one block thick and sprinkle the layer around for things like plants and flowers, or make it several blocks thick and paint it in solidly to create glaciers, etc.
- Create a Custom Object Layer. This will load bo2 files and/or schematics and spawn them randomly on the map where you paint the layer. Schematics and bo2 files can contain custom blocks from mods if you export them from a map containing such blocks.
Please note: many mods have dynamic block ID’s at runtime which are different than the block ID’s stored on disk. The clue is often that these ID’s are higher than 4095, which is not possible on disk. Make sure to find out from the mod’s authors or documentation what the static, on-disk block ID’s are and use those in WorldPainter.
What is WorldPainter?
WorldPainter is an interactive map generator for Minecraft that allows you to “paint” landscapes as you would in Microsoft Paint or another paint program. The program starts users off with a basic Minecraft map, which can be edited with numerous terrain, material, tree, and shape brushes. WorldPainter is a great resource for Minecraft players looking to create their own themed or multiplayer maps.
WorldPainter is free to download, use, and distribute as open-source software licensed under the GNU Public License. The program is not affiliated with Mojang, the makers of Minecraft, in any way and was created by pepsoft.org. WorldPainter itself is largely self-explanatory: the buttons are all defined, and the controls are easy to understand. If you are unfamiliar with paint programs, however, WorldPainter can seem a bit daunting.

Learn how to use WorldPainter, a paint program that helps you generate and create maps with brushes, layers and other tools!
Расположение элементов
Кстати:
- Холст для рисования. Это полотно, на котором рисуется сама карта.
-
Панель инструментов. здесь находятся тоже довольно важные предметы — инструменты.
- Пирамида, повёрнутая на 45 градусов (треугольная)
- Обычная пирамида (квадратная)
- Заполнить жидкостью всю яму до той высоты, где вы кликнули (см. п. 7). ЛКМ заливает водой, ПКМ её высушивает
- То же самое, только вместо воды лава
- Поднять/Опустить ландшафт. ЛКМ выращивает холмы и горы, ПКМ — ямы и овраги
- Выровнять ландшафт, сделать его более плоским
- Смягчить ландшафт, сделать более гладким (размыть в стороны)
- Вырастить гору из земли (тип горы настраивается в параметрах мира)
- Установить точку респавна игрока
- Высушивает воду только в тех местах, где вы ей проводите
- Параметры мира
-
Панель слоёв. Здесь отображаются отдельные слои.
- Мороз — покрывает снегом поверхность льдом водоёмы
- Пещеры — создаёт сеть пещер. В параметрах мира можно настроить естественную генерацию пещер, тогда этот слой можно не использовать
- Пропасти — создаёт пропасти и обрывы (насколько я знаю, только в пещерах)
- Лиственные — рисует дубовый лес
- Сосновые — хвойный лес
- Болота — болотный лес
- Джунгли — тропический лес
- Пустота — рисует пустоту — пропасть в никуда
- Ресурсы — спавнит залежи руд, пучки земли/гравия, воды под землёй и т.д. В параметрах мира можно настроить естественную генерацию пещер, тогда этот слой можно не использовать
- Заселение — отдельная тема, рассмотрим в конце
- Только чтение — чанки, помеченные этим слоем, при соединении проектов WorldPainter в одну карту (Ctrl+R), при этом экспортироваться не будут
- Биомы — открывает список биомов для их последующего нанесения на карту. Присутствует поддержка кастомных биомов, например добавляемых модами
- Аннотации — позволяет делать пометки (комментарии) у себя на карте, которые не будут видны после её экспорта в Minecraft. Но в параметрах мира можно включить экспорт аннотаций вместе с картой (они превратятся в шерсть)
- Панель блоков. С помощью неё можно выбирать блоки, которые надо наносить кистью. Можно также выбрать свои блоки (в ячейках с цифрами), для этого просто переключитесь на другую вкладку чуть левее
-
Панель кистей. Здесь находятся различные кисти для рисования — квадратные и круглые. Чуть ниже находится панель с настройками кисти.
- Поворот — поворачивает кисть на указанное кол-во градусов. Если она квадратная, то при значении в 45 градусов она станет ромбом
- Интенсивность (плотность) — объясню на примере. Допустим, вы рисуете сосновый лес. Чем больше интенсивность, тем он будет плотнее. А если вы рисуете блоками, то с максимальной интенсивностью они будут рисоваться моментально, а не пока вы зажимаете ЛКМ, дожидаясь пока ими зарисуется вся область. Поэкспериментируйте с ним, если не совсем поняли
- На или над — эта опция позволяет рисовать только на определённой высоте или выше
- На или под — позволяет рисовать только на определённой высоте или ниже
- Перо — двигать ли блоки сверху (например, когда вы используете сглаживание и эта опция включена, то сглаживаться будут блоки на всех высотах, в общем выкопайте яму и посмотрите сами, что будет когда эта опция включена)
- Только на — рисовать только на определённом блоке (например, обсидианом на траве, что позволяет не задевать при рисовании, скажем песок)
- Исключая на — на каком блоке рисовать не следует, т.е. какой блок не задевать
- Координаты курсора мыши (координаты X и Z соответственно)
- Высота, на которой находится курсор мыши (координата Y)
- Блок, на который наведён курсор мыши
- Биом, в котором находится курсор мыши. Биомы могут появляться при установке некоторых блоков (например, если установить мицелий, то там будет биом грибного острова)
- Радиус кисти (в блоках). Меняется колесом мыши
- Уровень приближения (в процентах)
Is Multiplayer supported? How do I put the map on a Minecraft server?
Yes, Multiplayer is supported. Multiplayer maps are exactly the same as Singleplayer maps. Just Export the world like normal. Then, if you run the Minecraft server on the same computer, just move or copy the generated map directory to your Minecraft server installation directory, edit the property in the file to be the same name as the directory, and (re)start the server. If the server is on a different computer the steps are the same, but you will have to transfer the map to the server somehow, generally by zipping it and transferring it to the server using a program such as Filezilla. Those details are beyond the scope of this site though. Ask your server administrator for the best way to transfer maps to the server, or google the subject.
Water and Lava
There are two water and lava related options you can set:
- The remove water or lava option controls whether existing water (or lava) will be removed and floors, walls and ceilings rendered underwater (when on), or whether existing water (or lava) will be left in place and floor, wall and ceiling blocks not placed underwater (when off — the default). Note that this only applies to water or lava from WorldPainter terrain generation or the Flood or Lava tools, not to water from the Resources layer or custom layers.
- The flood the caves/tunnels option controls whether the generated caves/tunnels will be flooded. You control the level to which they will be flooded, as well as whether they are flooded with water or lava
Applying a Terrain Type Directly
A terrain type can also be applied to a world directly, without a height map but optionally with a filter:
wp.applyTerrain() // The terrain type index to set
    .toWorld(world) // See "Loading a World" or "Creating a World from a Height Map"
    .withFilter(filter) // Optional. Specifies conditions for where the layer will be applied. See below for details about creating a filter
    .applyToSurface() // Optional. Mutually exclusive with applyToNether() and applyToEnd(). Indicates that the layer should be applied to the Surface dimension. This is the default
    .applyToNether() // Optional. Mutually exclusive with applyToSurface() and applyToEnd(). Indicates that the layer should be applied to the Nether dimension
    .applyToEnd() // Optional. Mutually exclusive with applyToSurface() and applyToNether(). Indicates that the layer should be applied to the End dimension
    .go();
For an overview of the actual terrain type indices to use in applyTerrain() and the terrain types to which they correspond, see this page. Note that if you want to include Custom Terrain types which aren’t already present in the world, you must install the Custom Terrain type on the world first (see «Installing a Custom Terrain» above) and that operation will return the terrain index to use for that particular Custom Terrain.
Create a New Minecraft World
While opening WorldPainter starts users with a default Minecraft world, you can generate a more specific seed if desired. This option makes it easier to generate themed worlds and change the default terrain of the map. To start a new Minecraft world:
- Left-click on the “File” menu option.
- Left-click on “New World”.
- Alter the topography and materials.
- Left-click “Create” to generate the world/
You can experiment with many different settings here by doing a number of different things, including:
- making your world hilly or flat
- Raising and lower the water level
- Changing all water into lava
- Placing beaches around water
Most importantly, there is the option to change the surface material of the map, from grass to sand to cobblestone and more.

Using a solid, round brush will paint on grass more realistically than other brushes.
Types of Layers in WorldPainter
| Layer Type | Layer Description |
|---|---|
|
Frost |
Cover the ground with snow and turn water to ice |
|
Caverns |
Generate underground caverns of varying size |
|
Chasms |
Generate underground tunnel or ravine-like chasms of varying size |
|
Deciduous |
Generate a deciduous forest |
|
Pine |
Generate a pine forest |
|
Swamp |
Generate swamp land |
|
Jungle |
Generate a jungle |
|
Void |
Just the long drop into nothingness |
|
Resources |
Underground pockets of coal, ores, gravel and dirt, lava and water |
|
Populate |
Let Minecraft populate the land with vegetation, snow, resources and water and lava pools |
|
Biomes |
Enable Custom biomes in the Edit menu to enable biome editing |
By using different brush textures and layers, users can create many different features on their Minecraft map. The jungle layer above the water above was applied with the spike circle brush to create a soft of oasis for players; this way, wood can be obtained outside of the desert. Experiment with different types of terrain to see what you like!

The pyramid tool is a fun way to add large, realistic structures to a desert world.
Export the Map as a Minecraft Map
Once you finished creating and editing your map in WorldPainter, it is time to export it as a Minecraft map! While saving your WorldPainter file saves your project for later editing, exporting it allows you to access it in Minecraft as a playable map. Then you get to see the fruits of your labor! To export your map, follow these steps:
- Left-click on the “File” menu option.
- Left-click on the “Export” option.
- Left-click on “Export as new Minecraft map”.
- Edit world name and options as desired.
- Left-click “Export” at the bottom of the window.
Choosing to export your map gives users a final chance to change some of the properties, as well as the type of map to create. Users can export their map in Survival, Creative or Adventure mode and enable or disable cheats. You can also choose the world type — Default, Superflat, or Large Biomes. The map will be exported directly into your Minecraft .saves folder unless you choose another location.
Once you’ve exported your world map, take it for a test drive! If something didn’t come out the way you planned, go back into the original WorldPainter file and edit it. Have fun making your own Minecraft worlds, and feel free to leave feedback in the comment section below!
Layer Colouring
Depending on the settings you chose, the layer may not actually produce caves everywhere you paint it. If the floor height is higher than the terrain height where you paint the layer, for instance, a cave will obviously not be produced. Also, the combination of floor and ceiling modes and levels might result in there not being any cave at all where the terrain is too low (for instance when the ceiling is set to fixed depth and the floor to fixed level or opposite of terrain).
Similarly, a cave might not be entirely underground. If the floor is below ground level, but the ceiling is above it, the cave will break the surface and be open to the outside air.
To be able to better judge this, the cave layer will be painted in different intensities:
- Lighter shade — if there is no cave at all as a result of the combination of floor and ceiling modes and levels and terrain height, or if the cave is entirely above the surface, and the layer will therefore not have any effect at all.
- Darker shade — if there will be a cave, and it is entirely underground — i.e. both floor and ceiling are below surface level.
- Solid — if there will be a cave, and it breaks the surface — i.e. the floor is below surface level but the ceiling is above it. This allows you to quickly see where tunnel entrances and exits will be, and to adjust the terrain after painting a cave to fix «holes» where the cave breaks through to the surface unintentionally. Note that this is only approximate though! It does not take the wall depth settings or random variation into account.
History[]
| Java Edition Indev | |||||
|---|---|---|---|---|---|
| Added paintings. | |||||
| There are currently 19 canvases, which can be viewed at Java Edition history of textures/Paintings. | |||||
The crafting recipe of paintings uses eight planks.
|
|||||
| Painting textures are currently stored on a texture atlas called kz.png. | |||||
| Java Edition Infdev | |||||
| 20100227-1 | The crafting recipe has of paintings has been changed, so that it now uses sticks, rather than planks.
|
||||
| Java Edition Alpha | |||||
| v1.1.1 | Added five more painting canvases, for a total of 24. | ||||
| The textures of two paintings have been changed. | |||||
| Java Edition Beta | |||||
| 1.2_01 | Added a new painting, although it uses an untextured part of kz.png due to the painting texture not yet being implemented. | ||||
| 1.3 | The texture of the new painting, has been added to the part of kz.png displayed by the new painting. | ||||
| Custom paintings are mentioned by Notch. | |||||
| 1.7.3 | Paintings pushed by pistons now pop off. | ||||
| Java Edition | |||||
| 1.4.2 | 12w36a | Added new painting canvas ‘Wither’. | |||
| Paintings can now be placed overlapping one another. | |||||
| 1.8 | 14w10a | Paintings can no longer be placed directly inside of each other. | |||
| 1.9 | 15w49a | Paintings can no longer be destroyed by lightning. | |||
| 15w50a | Added sounds for placing and breaking paintings: and . | ||||
| 1.11 | 16w32a | The entity ID for paintings has been changed from to . | |||
| 1.12 | 17w06a | Paintings now have a more intuitive placement system. When placed, a painting always uses the maximum possible amount of available space. | |||
| 1.13 | 17w47a | Prior to The Flattening, this item’s numeral ID was 321. | |||
| 18w02a | Paintings now use a resource location for their motive. | ||||
| 1.14 | 18w43a | The item texture of paintings has been changed. | |||
| 19w07a | Paintings are now stored as individual image files instead of parts of a single large image file, and now support animations. | ||||
| 19w11a | Shepherd villagers now sell paintings. | ||||
| 1.17 | 21w11a | The painting back texture has been updated to be in line with the texture update. | |||
| Pocket Edition Alpha | |||||
| v0.5.0 | Added paintings. | ||||
| There are currently 25 canvases, which can be viewed at Bedrock Edition history of textures/Paintings. | |||||
| v0.8.0 | build 3 | A new painting rendering has been added.[more information needed] | |||
| v0.12.1 | build 1 | Paintings are no longer available from the nether reactor. | |||
| v0.15.0 | build 1 | Paintings now have sounds when placed and broken. | |||
| Pocket Edition | |||||
| 1.0.7 | Added new painting canvas ‘Wither’. | ||||
| Bedrock Edition | |||||
| 1.10.0 | beta 1.10.0.3 | The item texture of paintings has been changed. | |||
| 1.11.0 | beta 1.11.0.4 | Paintings can now be bought from shepherd villagers. | |||
| 1.17.0 | beta 1.17.0.50 | The painting back texture has been updated to be in line with the texture update. | |||
| Legacy Console Edition | |||||
| TU1 | CU1 | Patch 1 | 1.0.1 | Added paintings. | |
| There are currently 25 canvases, which can be viewed at Legacy Console Edition history of textures/Paintings. | |||||
| TU11 | The limit for paintings in a world has been increased. | ||||
| A message is now displayed when the maximum paintings are reached. | |||||
| TU14 | Added new painting canvas ‘Wither’. | ||||
| TU43 | CU33 | Patch 13 | Added sounds for paintings. | ||
| The item texture of paintings has been changed. | |||||
| New Nintendo 3DS Edition | |||||
| 0.1.0 | Added paintings. | ||||
| There are currently 25 canvases, which can be viewed at New Nintendo 3DS Edition history of textures/Paintings. |
Reduce WorldPainter’s memory usage
If that didn’t work, you can try to get WorldPainter to use less memory during the export, by making it export fewer regions in parallel. Normally it tries to use all your CPU cores at once, but each parallel export takes up memory and reducing the parallelisation, while making the export go slower, might avoid the thrashing condition and allow it to actually complete.
1. Determine how many cores it’s trying to use
The first step is to determine how many cores WorldPainter was trying to use for the hanging export, by looking at the log file. The log file is called , and is located in on Windows, on Mac OS X and on UNIX/Linux. Open it using any text editor and look for a line that looks like this:
Make sure it is the one for the hanging export (probably the last one in the file, unless you tried more exports after that). The n is the number of cores it was trying to use.
If n is 1 then it was already using no parallelisation whatsoever and there is no use in proceeding.
2. Configure it to use fewer cores
To configure WorldPainter to use fewer cores, use a text editor to open the file (on Windows and UNIX/Linux) or (on Mac OS X) and add the following line:
Where n is one less than the number determined in step 1! For details about how to find and edit these files, see the MoreMemory page.
3. Rinse and repeat
Save the file, (re)start WorldPainter and retry the export. If it now works, great! If it doesn’t, repeat step 2 until you reach 1 core, at which point there is no use in proceeding.
Note: if you can’t get it to work, then remove this parameter from the file again! Otherwise it will unnecessarily keep throttling WorldPainter while you try other options.
How do I edit existing Minecraft maps?
WorldPainter is a map generator, not an editor! The basic idea is to use it for generating new maps which you then edit with other tools such as creative mode, WorldEdit, VoxelSniper or MCEdit.
Having said that, WorldPainter does have limited support for making changes to existing maps, using the Import and Merge operations. Import (Ctrl+I or File -> Import -> Existing Minecraft map…) will create a new WorldPainter world based on the landscape (terrain height and type and biome information, but no underground or above ground structures, trees, etc.) of an existing map. Merge (Ctrl+R or File -> Merge world…) will merge any changes you make back to the existing map.
Important notes:
- You have to use Merge (Ctrl+R), not Export, to save your changes back to the existing map!
- When Importing an existing map, any chunks containing man-made blocks will be marked read-only, visible by a black cross across them. This includes underground blocks from mines and strongholds. Chunks that are marked read-only are not merged during the Merge process. You can still make changes to them in the editor, but those changes won’t be saved. This is to protect man made structures from the merge process, which can be destructive and mangle structures, especially if you changed the slope of the terrain. If you still want to make changes to those chunks (at your own risk), you can remove the read-only layer (like any other layer: select the Read-only button and right-click to remove it). Note that you can also add the read-only layer to areas where you don’t intend to make changes, which will speed up the merge process.
Loading a Height Map
There are several operations which take a height map as input. Here is how to load one:
var heightMap = wp.getHeightMap()
    .fromFile('path/to/heightmap/myheightmap.png') // The filename of the height map to load. Supported formats are dependent on the Java platform, but usually include at least PNG and TIFF
    .selectRedChannel() // Optional. If the image is not a grayscale image you may invoke ONE OF selectRedChannel(), selectGreenChannel() or selectBlueChannel() to indicate which channel should be used to read values from. This is the default for colour images
    .selectGreenChannel() // Optional. If the image is not a grayscale image you may invoke ONE OF selectRedChannel(), selectGreenChannel() or selectBlueChannel() to indicate which channel should be used to read values from. The default is to use the red channel for colour images.
    .selectBlueChannel() // Optional. If the image is not a grayscale image you may invoke ONE OF selectRedChannel(), selectGreenChannel() or selectBlueChannel() to indicate which channel should be used to read values from. The default is to use the red channel for colour images.
    .go(); // Returns the loaded height map for use in other operations
Change Brush Size and Texture
In the right toolbar of WorldPainter, there are fourteen brush tools of differing sizes and textures. There are also more brush options, such as rotation, intensity, and more specific level adjustments. Using these tools properly can help you create a sparse forest, a deep ocean, and other natural landmarks. The brush tools include the following:
- Spike Circle
- Spike Square
- Noise
- Linear Circle
- Linear Square
- Cracks
- Sine Circle
- Sine Square
- Constant Circle
- Plateau Circle
- Plateau Square
- Constant Square
- Dome Circle
- Dome Square
Different types of brushes are more suitable for different terrain; for example, you’ll want to use a circle-shaped brush to make a large body of water for a more natural look. You can use the cracks brush to sprinkle grassy land with rock or snow. Experiment with the brushes to figure out which ones suit your need best.

Editing your dimension properties is a great way to completely customize your map.
Mixing Populate with other layers
If you mix Populate with the other layers and features of WorldPainter (some of which are enabled by default) you might get unexpected or unintended results. It’s important to know what it does and what the consequences are.
For instance, WorldPainter by default already generates underground ores, water and lava (as controlled by the Resources layer, which is turned on everywhere by default on the Dimension Properties or Export screen). If you leave that turned on, and then also use Populate, you will get double the resources. This may or may not be what you want, but you should be aware of it.
Another example is forests. If you use one of WorldPainter’s tree layers (Deciduous, Pine, Swamp or Jungle), WorldPainter will generate trees in those areas (with a size and density determined by the intensity with which you painted the layer). By default (if «automatic biomes» is enabled), it will also set the biome in those areas to «forest» (or «taiga» if you also use the Frost layer in the same area). That means that if you use Populate in the same location, or enable «allow Minecraft to populate the entire terrain», Minecraft will also generate trees there and you will get double the amount of trees! Again this may or may not be what you want, but you should be aware of it.