The hunted, part two
Содержание:
Episode 1[]
After waking up and recovering from the plane crash a day after the First Flare occurred, Mackenzie makes his way out of the ravine he was stuck in, looking for Astrid along the way. He finds his way to a road leading him to the Town of Milton.
He arrives to find the town abandoned. Only one structure show signs of life.
He meets Grey Mother, an elderly, seemingly blind woman, in her home after she fires a warning shot at him. She explains to him how all the residents have fled after the storm, fearing they might become trapped in the town after the First Flare and a serious storm hit the town.
After she tasks Mackenzie with fetching her firewood and food, she explains to him how the power went out and people started to get cold, hungry, and scared, and, how, eventually, the few remaining fled. She mentions how a stranger (suggested to be Astrid) passed through the town with «angry voices» trailing her. Grey Mother tells Mackenzie to go investigate the tunnel at the end of the road.
Mackenzie arrives at the tunnel to find it collapsed. A crashed prison transport bus shows signs that Astrid may have passed through. In the bus the word «Perserverance» is written on the floor is what is presumed to be blood.
Mackenzie goes back to Grey Mother, and she gives him one final task, to visit the old farmhouse and retreive a key to her lockbox in the bank. After Mackenzie retreives her safety deposit box he finds out it was all for a piece of jewelery special to Grey Mother.
She tells him to bring the pearls to «Lily» at the graveyard. At first, Mackenzie is confused, but eventually realizes that Lily was Grey Mother’s daughter.
Upon returning, she tells him the story of how her daughter died. Grey Mother gives Mackenzie the key to her daughter’s trunk, where he finds climbing equipment. She tells him how to leave the area and to leave her behind, as she cannot escape the town, even if she wanted to.
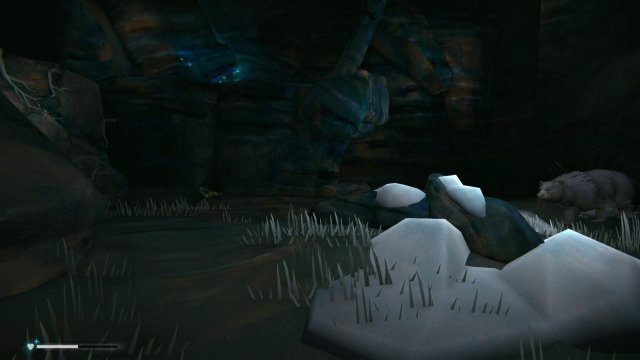
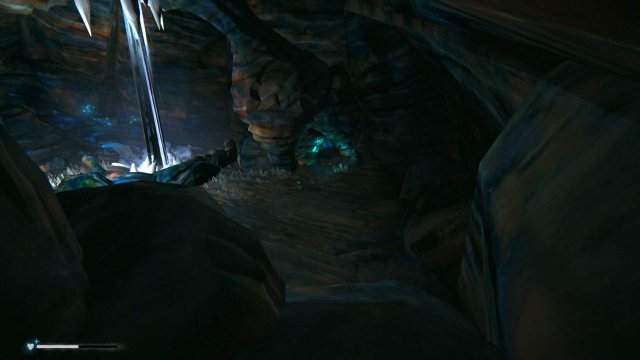
Mackenzie bids farewell to Grey Mother and leaves Milton through the back mountains. His rope snaps on the way down, but he recovers and continues on to a cave. Upon entering and going through the cave he finds his way to Mystery Lake, where he encounters Jeremiah, the old Trapper, being attacked by the Old Bear. He grabs the Trapper’s rifle and fires at the Old Bear, ending the episode.
Волки
Похоже, что волки самые распространённые животные, представляющие угрозу в игре. Волки любят атаковать сзади. Иногда их можно просто обогнать, а затем повернуться лицом к лицу и отступить. Чтобы их отпугнуть, можно использовать источники света, сигнальные ракеты или обгорелые полена. Если используете оружие, прицеливание по волкам, как правило, побуждает их атаковать, поэтому лучше опуститься на землю! Мясо волка можно есть, а их шкуры можно использовать для создания высокоэффективной одежды.
Если волк укусит, от него всё таки можно отбиться. Если есть оружие, например топор, можно только повредить волков, что часто приводит к тому, что они истекают кровью и позже умирают. Хедшоты — это гарантированное убийство волка, другие выстрелы заставят их убежать и истекать кровью. Они оставляют след крови, поэтому их можно выследить. Укусы волка нужно исцелять с помощью опции аптечка кругового меню. Бандажи и дезинфицирующие средства полностью излечат. Если подцепите инфекцию, вам понадобятся антибиотики и постельные принадлежности . Волки могут повредить одежду.
Mission: What One Man Can Do
Objective: Search The Cave For Your Bear Spear.
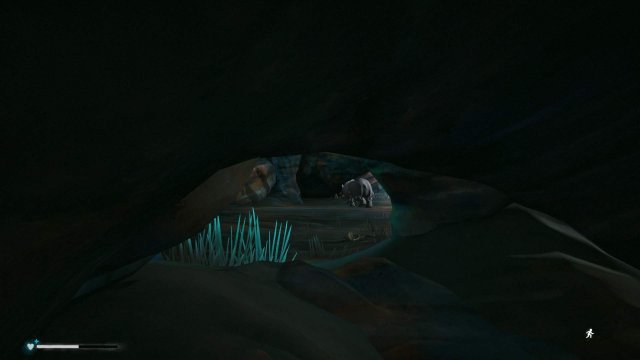
You wake up in the bear’s den, weaponless, itemless, and ragged. The bear is nearby, distracted by a Wolf carcass. Take care not to approach the bear, or he will ravage you to death. If he stops to sniff the air, you’re getting too close. Getting past the bear can be difficult, but fortunately this mission has several checkpoints, the first of which is waking up in the cave.
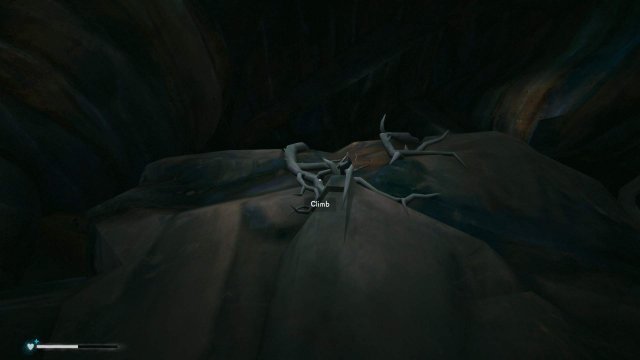
To your left is a wall with some roots you can climb. At the top, turn around and continue along the ledge to the left. There will be a small opening with a passage leading to a larger cave system. Stepping onto the snowy patch is the next checkpoint.
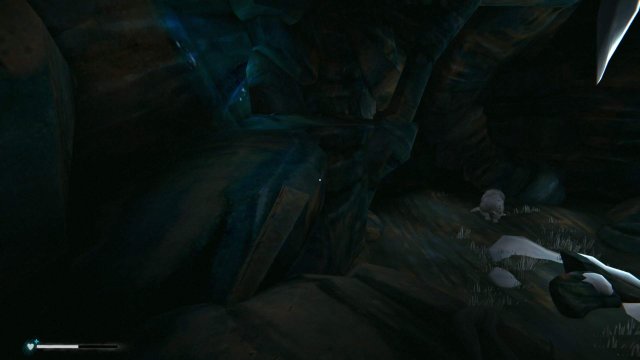
Turn right and follow the tunnel, but beware the hole in the floor leading directly into the bear’s clutches.
At the end of the tunnel is a ledge beside a large hollow room with a waterfall. The bear wanders into the room and begins to patrol in a triangular patter. He heads for the corpse on the left side of the room, sniffs it, then wanders to the opposite side of the room, sniffs the ground again, then wanders toward the entrance ledge, sniffing the ground once more.
Follow the ledge along the right-hand side. The ledge ends in a small downhill slope. Wait for the bear to approach the corpse on the opposite side of the room, then sprint for the small cave opening across from the slope. You will have to crouch to enter. If the bear spots you, he will roar before charging; if he loses sight of you, he will make the running-scared sound and resume his patrol.
Watch the bear’s movements from the cave opening, taking care not to step out of your shelter. As soon as he is starting to head away from you on his patrol, move to the other side of the cave, leave the shelter and sprint for another cave opening on the opposite side with a small river flowing down into it from the waterfall in the middle of the room. The tiny river ends with another cave passageway to your right. Reaching the end of the river is the another checkpoint.

Proceed slowly through the cave opening, then back up as soon as you see the bear again. Allow the bear to meander toward the back of the room as he begins another triangular patrol, following at a safe distance, then crouch to enter through a cave opening on your left.
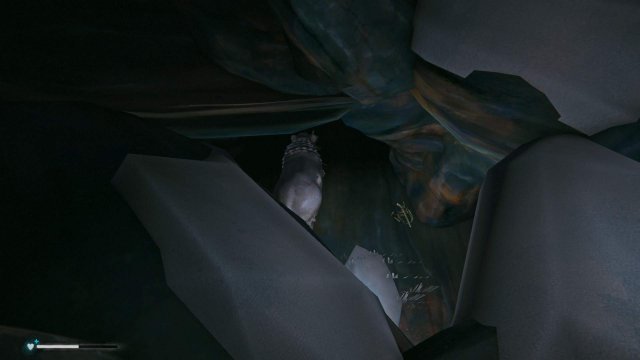
Follow the cave until it forks. On the left is a small room with a Frozen Corpse carrying an Emergency Stim and a Bandage at its feet. On the right is a snow patch with some Painkillers. Continue through the right-hand passage to reach another small cave opening and the next checkpoint.
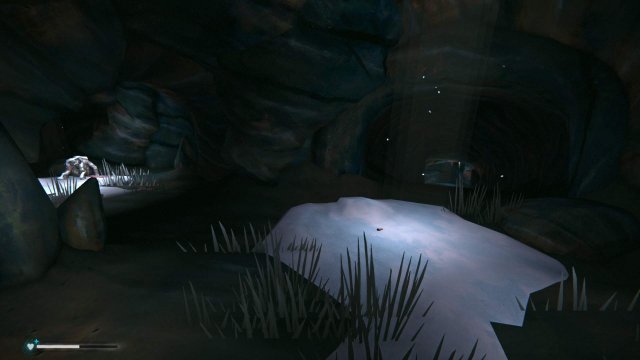
This time the bear’s patrol pattern is slightly shorter on the second leg of the triangle. Follow at a safe distance while the bear walks away from the opening you entered through, then when the bear turns to make the next leg of his patrol, sprint for the cave opening across from the entrance and crouch to enter the cave shelter. There are openings in the rock that you can look through to observe the bear’s progress. Wait a few seconds for the bear to turn away, then leave through the other side of the shelter and sprint across the room to a third cave opening leading to the snowdrift room and the final checkpoint.
Objective: Retrieve The Spear.
Lying on some rocks beside an uprooted tree is the spear. The bear enters the room from the bottom right and begins to patrol. Like before, he investigates each corner of the room, but this time his pattern is more random, so you will need to pay attention to where he is heading. However, shelter tunnels are more numerous and closer together here, and there is even a shelter in the column.
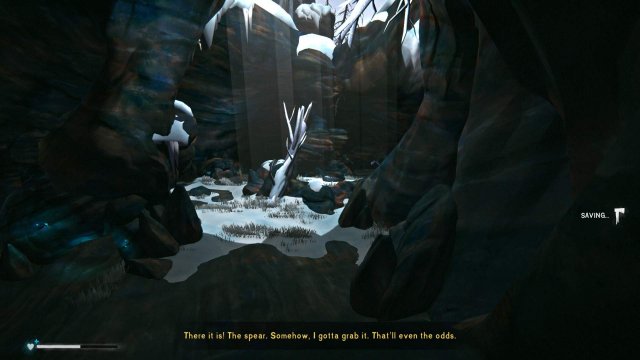
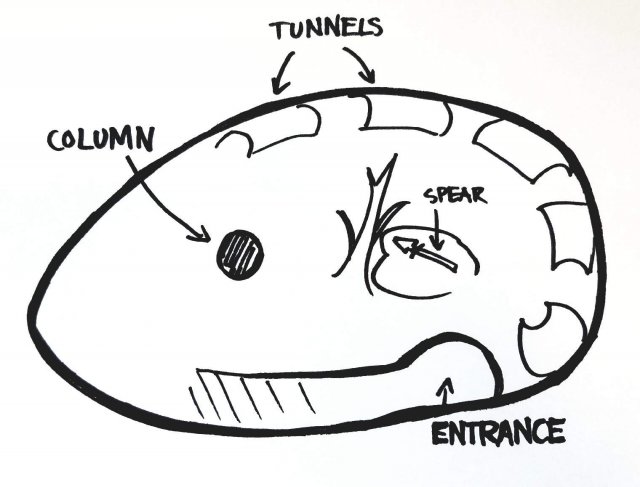
Maintaining a safe distance from the bear, turn left and descend the slope, then circle around the column along the left and sprint for the first cave opening, crouching to enter. Proceed along the outer wall as the bear’s movements permit. Once he moves far enough away, sprint toward the rocks by the tree and grab the Bear Spear, equipping it immediately. Prepare to face the bear.
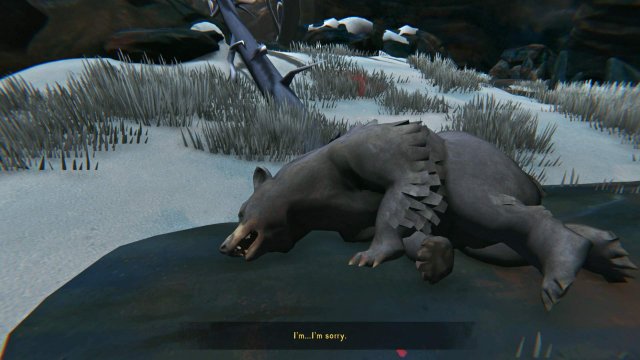
This time when he attacks, you will need to win the struggle. Fill the “Fight Back” bar before he finishes his attack. You may have to fight him more than once, but getting attacked will no longer instantly kill you. If you need time to treat injuries, sprint to one of the tunnel-shelters. Also, sometimes the Bear Spear disappears into the ground when dropped, but usually some portion of the spear point or red wrapping on the handle is showing. Once you have defeated the bear, a short cutscene with the bear will play, followed by another cutscene with Jeremiah.
After the cutscenes, you will be permanently kicked out of the Trapper’s Cabin with all the items previously inside the cabin now held in your inventory. Store unwanted weight in Jeremiah’s Supply Bin outside the cabin’s door.
Mission: The Wounded Trapper
Objective: Enter The Abandoned Dam
In order for the trapper, Jeremiah, to survive, he will need your help. Specifically, he needs some items from the abandoned Carter Hydro Dam. (Note: If the quest objective to mend clothing items three times for “The Basics of Survival” did not trigger during Episode One, it registers properly with the beginning of this episode.)
Jeremiah gives you a Hunting Rifle and some Rifle Ammunition, but the rifle is in poor condition and should be cleaned before using it with a Rifle Cleaning Kit you can pick up later. If you do use it, the rifle may jam. Reload to clear the jammed bullet, and don’t forget to pick the round up, since it doesn’t count as fired and is still good as ammunition. You can store the Rifle and other supplies in Jeremiah’s Supply Bin outside the Trapper’s Cabin. Later in the story you will be kicked out of the cabin with all loose and stored items now in your inventory, so store your items either in the bin or in the Mystery Lake Camp Office to avoid being weighed down later.
To begin your journey, leave the Trapper’s Cabin and walk toward the collapsed building nearby. Keep walking past it and you should eventually run across some train tracks. Turn left at the tracks and keep heading north to find the dam.

If you are low on supplies, a little farther down the tracks from the cabin is a clearing on the right leading to the Camp Office beside Mystery Lake which contains some useful items, including a Storm Lantern, a Hatchet beside the Pot Belly Stove, Whetstone on the Workbench, an extra Bedroll on the second floor, and a pair of Trail Boots beside the bunk beds. Also, there is a Hunting Knife and some Rifle Ammunition in the Ice Fishing Hut near the little island in the center of Mystery Lake. Once you’ve gathered what you need, head north along the frozen riverbed or return to the train tracks toward Carter Hydro Dam.
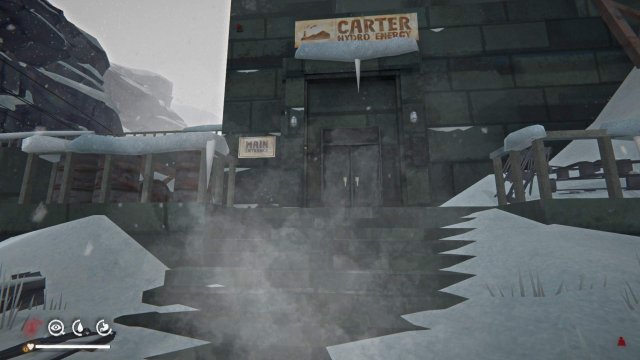
After a short train bridge, the dam will be on the left. Watch out for a Wolf that patrols this area. To the left is a chain-link fence with a locked door, but you can open the gate using the “Carter Hydro Staging Area Gate Key” found on the desk in the trailer farthest from the train bridge leading to Carter Hydro Dam. Once you open the gate, a short cutscene plays.

You will wake up a few hours later, very cold. Go inside the dam to warm up. (Note: If you’re having trouble ascending the stairs, use the snow slope along the right side and point toward the top corner.)
Objective: Find The Radio Parts The Trapper Needs.
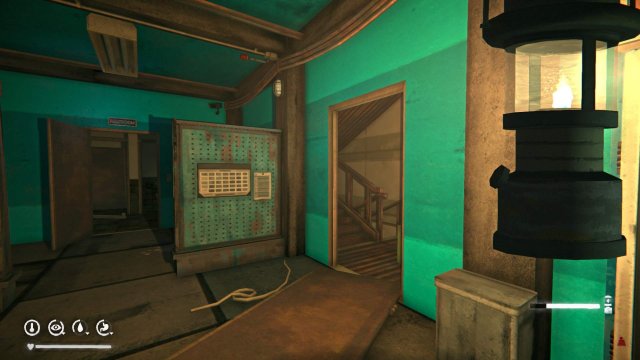
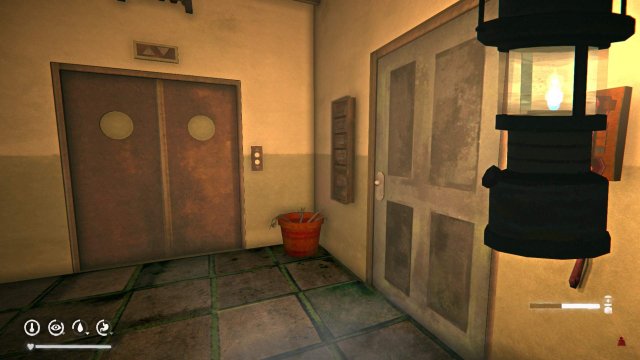
Inside the Carter Hydro Dam, there is a Storm Lantern on the desk just inside the front door. The lantern will make it easier to explore indoors without having to use up valuable Flares, Torches, or Matches. Straight across from the entrance is the Control Room with a Keypad which keeps the room locked for now. To the right is a Restroom near the entrance, and farther in on the right is an Elevator near the Control Room. Near the Restroom is a set of stairs leading to other floors. To the left is an office area and, farther in, the Turbine room.
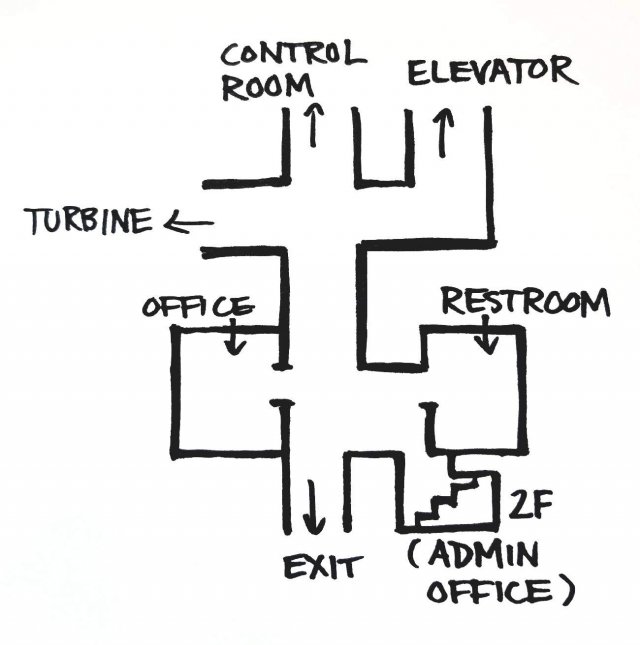
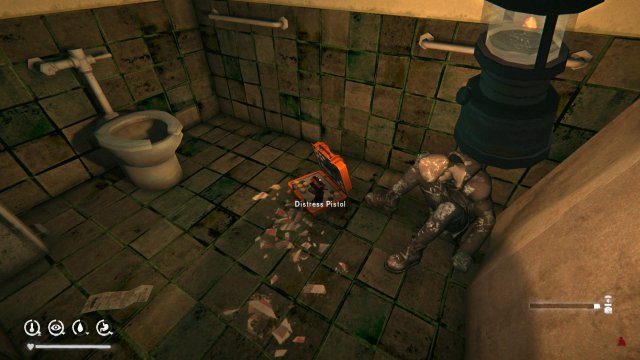
Enter the Restroom and loot the Frozen Corpse in the stall to obtain the “Admin Office Key.” Exit the Restroom and immediately turn left into the stairwell and go upstairs to the second floor.
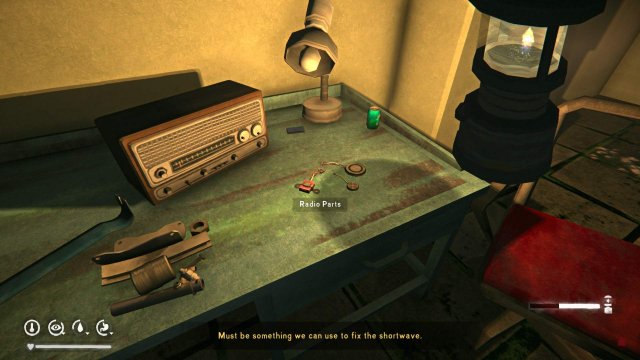
In the outer office is a Workbench. Pick up the “Radio Parts” sitting atop the Workbench. You can also take the Prybar, which is useful for opening locked car trunks and Lockers.
Objective: Find Medical Supplies For The Old Trapper.
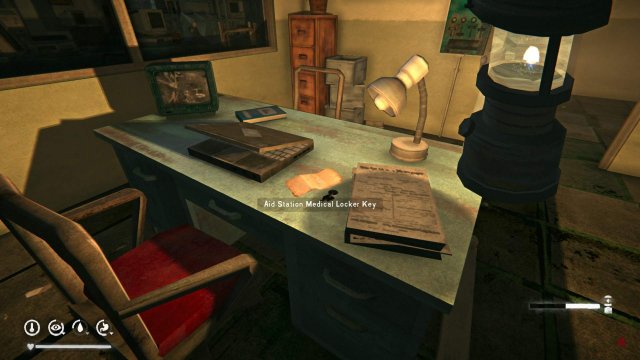
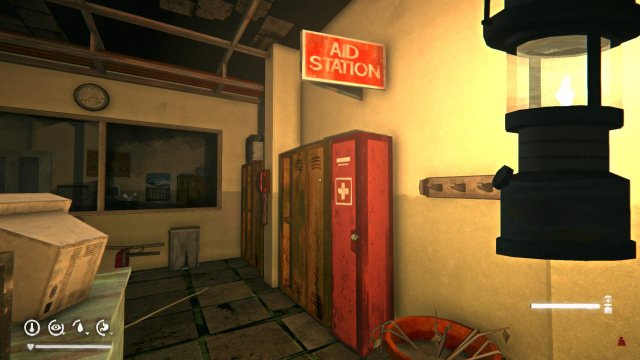
Inside the Admin Office near the elevator is a locked door leading to an inner office which requires the “Admin Office Key” to open. Go inside the inner office, and on the desk will be the “Aid Station Medical Locker Key.” Use the key on the red medical locker in the outer office to obtain the “Carter Hydro Medical Supplies.”
Objective: Get The Medical Supplies Back To The Old Trapper Before He Dies.
This objective is not a timed event, despite the description. Follow the railroad tracks back to the Trapper’s Cabin. If it’s late in the day, you can spend the night at Carter Hydro Dam or the Abandoned Lookout, which is a bit of a climb but has some side quest triggering items.
Continue following the railroad tracks until you see the railroad tunnel, then turn right toward the woods and head for the Trapper’s Homestead. Once inside, another cutscene plays. Talk to Jeremiah about the “Bear,” the “Woman,” “Perseverance Mills,” and his “Idea?”
Рекомендации для этого испытания[]
После ролика «схватки» с матёрым медведем сразу же останавливайте кровотечение повязкой из рюкзака персонажа и только потом спускайтесь в подвал
И уже в подвале лечите риск заражения повязкой из старого висящего мха, которая также есть в вашем рюкзаке.
Важно осмотреть весь подвал в поисках нужного лута. Стоит потратить время на отдых в подвале Гребня Скитера и в спальном мешке восстановить здоровье и шкалу усталости, однако можно по тросам добраться до домика Уклониста и отдохнуть там — все зависит от погоды
Для спуска по тросам необходимо, чтобы ваш рюкзак весил не более 15 кг, иначе придется идти в обход и, скорей всего, замерзнуть.
Если вы все же провели в подвале достаточное количество времени, и матерый медведь далеко ушел, то за порогом вас может ожидать волк. И рекомендуется перед тем, как покинуть подвал, присесть
Выйдя в таком положении, вы не сразу привлечёте внимание волка. Это даст вам возможность сориентироваться и выбрать нужный момент, чтобы успешно с ним разминуться.
Если вы решите использовать сигнальный пистолет против матёрого медведя, то старайтесь попасть в самого зверя
Паника медведя продлится дольше, так как ракета застрянет в шкуре, и у вас будет больше возможности оторваться от преследования.
Если вы выстрелили, но не попали, то матерый медведь всё равно испугается и побежит в противоположную от вас сторону. Но фора в этом случае будет недолгой.
Не надо стрелять в бегущего далеко или идущего недалеко медведя. Медведь будет переходить с бега на шаг пять раз и только пятая пробежка закончится нападением, если перед этим не последует выстрел. Целиться и стрелять нужно только в бегущего рядом медведя.
Медведь в испытании отличается от медведя в выживании тем, что когда вы выходите из радиуса обнаружения у выживального миши — он вас теряет, а этот — приближается бегом. Не выходите из зоны его наблюдения — и он не будет бежать.
Когда матерый медведь преследует игрока, до того как он встанет на задние лапы, его можно привлечь мясом или рыбой, используя их в качестве приманки. Реагирует как волк: медленно идёт к мясу, съедает и убегает.
Может испугаться фальшфейера, если наступит на него или если вы его держите перед собой. Можно использовать в узких местах. Также данный медведь боится костра (не подойдет, если находится возле него), при этом желательно иметь при себе горючее, чтобы развести костёр быстро и наверняка.
Не поленитесь обыскать сейф на ГЭС, там может оказаться факельная ракета.
При выходе с ГЭС на Загадочное озеро обязательно держите пистолет, поскольку медведь может оказаться прямо перед вами и разминуться с ним будет невозможно. Калитку с ГЭС закрыть нельзя, поэтому запереть медведя не получится.
Extras: Documents
- The “Park Notice” is on a desk in the Mystery Lake Camp Office.
- The “Mystery Lake and Area” pamphlet is atop a desk on the second floor of the Mystery Lake Camp Office.
- The note “Off Season Fun” is found on the desk in Lake Cabin #2, which requires a key to unlock.
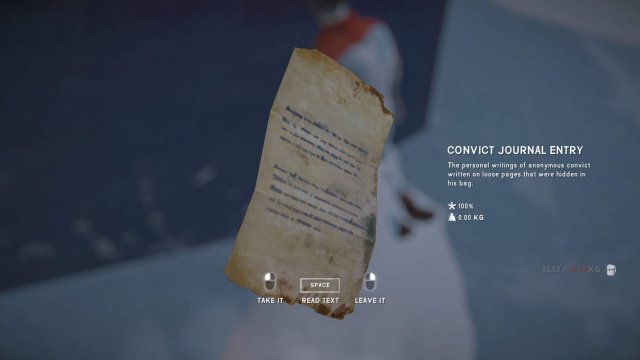
- The “Convict Journal Entry” is found in the green Backpack beside the Frozen Corpse leaning against the north face of the rocky outcropping of the final bend in the frozen riverbed leading to Mystery Lake.
- The “Breyerhouse Winter Crew Warning” is found on the desk in the trailer farthest from the train bridge leading to Carter Hydro Dam.
- The “Carter Hydro Dam” pamphlet is found on the corkboard behind the desk near the front entrance inside Carter Hydro Dam.
- The “Carter Hydro Dam—Safety & Shutdown Notice” is found on a desk in an office near the elevator on the ground floor of Carter Hydro Dam.
- The “Forest Talker Dam Note” is found on a Frozen Corpse in one of the stalls in the Restroom on the ground floor of the Carter Hydro Dam.
- The “Trash Can Note” is found in the Trash Can next to the sinks in the Restroom on the ground floor of Carter Hydro Dam.
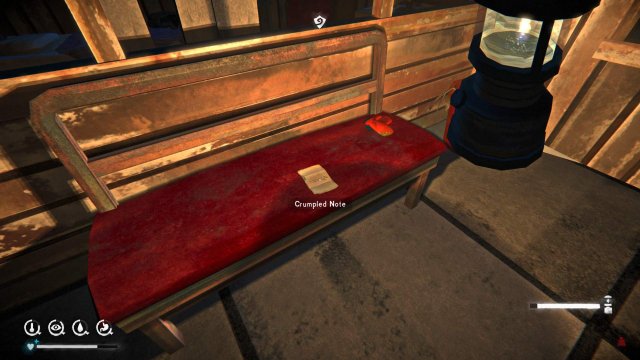
- A “Crumpled Note” is found on the desk in the Admin Office outer room in Carter Hydro Dam. The note activates a side quest to find a Mystery Lake supply cache.
- The “Elevator Maintenance Note” is found on the desk in the inner room of the Admin Office in Carter Hydro Dam.
- An “Illegible Note” is found on the desk in the Abandoned Lookout in Mystery Lake. The note activates a side quest to find a Mystery Lake supply cache.
- The “Blood Soaked Note” is found beside a Frozen Corpse at the Train Derailment on the far side of Forlorn Muskeg near the entrance to Broken Railroad. The note activates a side quest to find a cache in Broken Railroad.
- A “Crumpled Note” is found on the bench immediately inside the entrance of the Maintenance Yard building in Broken Railroad. Picking up the note triggers the “Lake Gunshots” side quest. This note is identical to the one found in the Maintenance Shed.
- The “Aurora Observations” note is taped to the computer on the desk inside the Maintenance Yard building in Broken Railroad.
- Another “Crumpled Note” is found on a chair in the office of the Maintenance Shed in Broken Railroad. This note is identical to the one found in the Maintenance Yard building.
- The “Forest Talker Flyer” is found beside the Frozen Corpse in an alcove near the Forge in the far right corner of the Maintenance Shed in Broken Railroad.
- The “Handwritten Note” is taped to the side of the entrance stairs to the Hunting Lodge is Broken Railroad.
- The “History of the Collapse, Part Three” is on some shelves beside the stairs in the Hunting Lodge in Broken Railroad.
- The “Forest Talker Note” is on the desk beside the Mountaineering Rope in the basement of the Hunting Lodge. The note triggers the side quest “Forest Talker Supply Caches.”
- The “Aurora Hatch Door Entry Code” is inside the Hidden Cache located north of the Hunting Lodge found with the “Handwritten Note” in Broken Railroad.
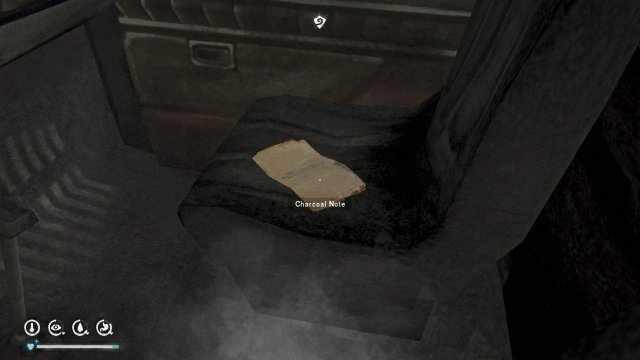
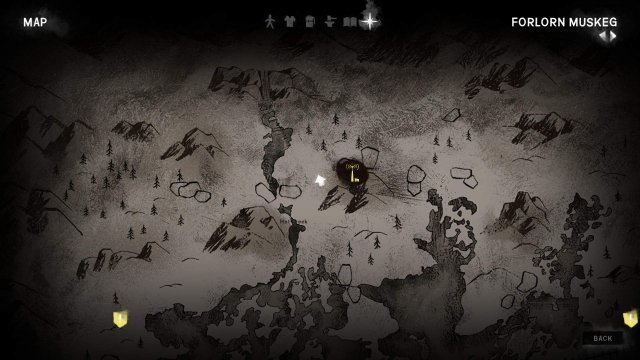
- The “Charcoal Note” is found in the truck beside the yellow train car at the end of the railroad tracks in Broken Railroad. Enter the truck on the driver’s side to be able to pick up the page. The note triggers a quest to find a cache hidden under some tree roots in Forlorn Muskeg on the lake north of the Old Spence Family Homestead and south of the overturned rail cars by the entrance to Broken Railroad.
- The “Letter For Hank’s Niece” is found on a Frozen Corpse beside an infinite fire near the Unnamed Pond in Mystery Lake. Finding the letter triggers the “Hank’s Hatch” side quest. (Note: The infinite fire does not appear at the very start of Episode Two but is present after the completion of “What One Man Can Do.”)
- “Hank’s Prepper Cache Code” is found in the lockbox in the Abandoned Lookout as part of the side quest “Hank’s Hatch.”
- The page “Hank’s Journal—Part One” is found in the lockbox in the Abandoned Lookout as part of the side quest “Hank’s Hatch.”
- The page “Hank’s Journal—Part Two” is found on the floor inside Hank’s prepper cache.
- The “Torn Paper” is found on the Frozen Corpse in the left-hand fork of the bear’s cave.
Приятного времяпровождения!
The Long Dark — невероятно насыщенная игра, и выяснение того, как все это работает доставляет огромное удовольствие. Лёгкие подсказки этого гайда должны помочь легче начать игру, но не помешают собственному опыту открытий. Игра рассчитана на несколько прохождений, и каждый раз сообщает о том, насколько хорошо вы выжили.
В The Long Dark есть достижения, но также есть подвиги для достижения определённых целей (просматриваемые через меню), которые могут обеспечить пассивные бонусы в новых прохождениях. Это может пригодится, если попытаетесь пройти игру на высоких сложностях, особенно в режиме «Незваный гость».
Если вы поклонник приключенческих игр на выживание, The Long Dark именно то, что доктор прописал.
Old Irish[edit]
Etymologyedit
Generally assumed to be a Latin loan, from () , but Joseph Loth believed it to be from Proto-Celtic; either way, cognate to Welsh .
Nounedit
long f (genitive lungae, nominative plural )
- boat
- ship
Inflectionedit
| Feminine ā-stem | |||
|---|---|---|---|
| Singular | Dual | Plural | |
| Nominative | longL | L | H |
| Vocative | longL | L | H |
| Accusative | N | L | H |
| Genitive | H | longL | longN |
| Dative | L | longaib | longaib |
Initial mutations of a following adjective:
|
Descendantsedit
- Irish:
- Manx:
- Scottish Gaelic:
| Old Irish mutation | ||
|---|---|---|
| Radical | Lenition | Nasalization |
| longalso after a proclitic | longpronounced with /l(ʲ)-/ | unchanged |
| Note: Some of these forms may be hypothetical. Not everypossible mutated form of every word actually occurs. |
Pijin[edit]
Prepositionedit
long
- to; toward; into
-
in; at; near
1988, Geoffrey Miles White, Bikfala faet: olketa Solomon Aelanda rimembarem Wol Wo Tu, page 75:
Bihaen hemi finisim skul blong hem, hemi go minista long sios long ples blong hem long ‘Areo.(please add an English translation of this quote)
This entry has fewer than three known examples of actual usage, the minimum considered necessary for clear attestation, and may not be reliable. This language is subject to a special exemption for languages with limited documentation. If you speak it, please consider or adding citations. See also Help and the Community Portal.
Mission: Signal to Noise
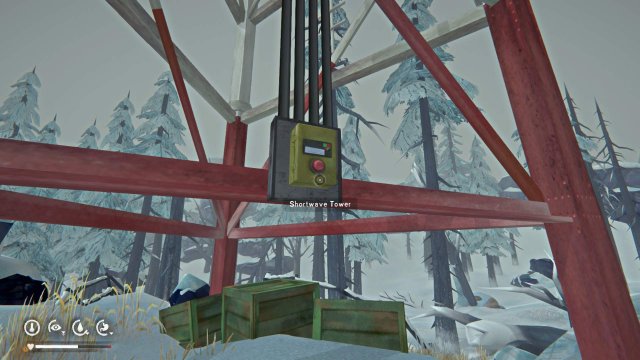
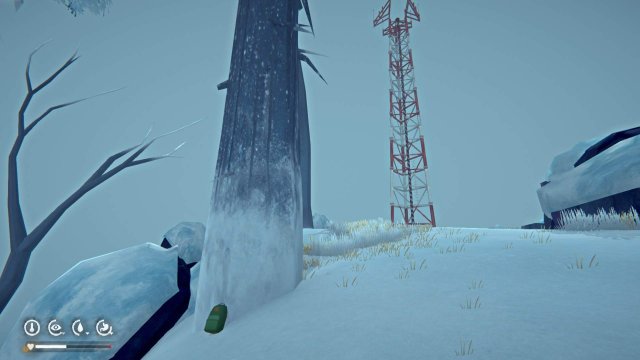
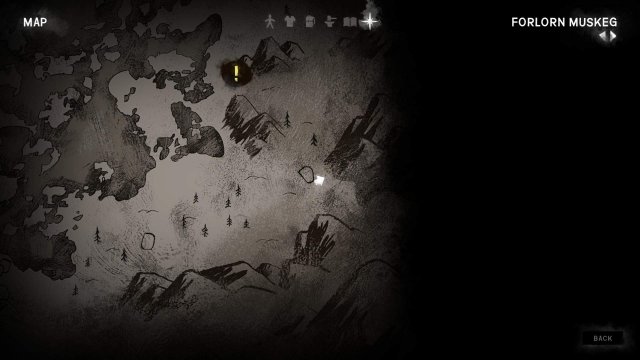
Objective: Retrieve Transponder Parts From Each Tower In Forlorn Muskeg.
There are three Shortwave Towers in Forlorn Muskeg: the north tower, the broken southwest tower, and the southeast tower. Each tower has a box fixed to the tower’s base which contains the needed parts. The bear will appear at the second two towers, depending on which order you visit them.
Before heading to Forlorn Muskeg, check your inventory of clothing and medical items. Make sure your clothing is in excellent Condition and has a good Protection rating, say 20 percent or higher. In your medical inventory, keep a good stash of Painkillers or Rose Hip Tea—minimum four to six doses—and some Bandages and a bottle of Antiseptic or at least two Old Man’s Beard Wound Dressings. You may also want to move items from inside the cabin to Jeremiah’s Supply Bin outside the door, or some other convenient location, since you may not have the opportunity to return to the Cabin before you are locked out. (Note: You will not lose items stored inside, but the weight may slow you down or cause you to be unable to move.)
Head south from the Trapper’s Cabin to the train tunnel to return to Forlorn Muskeg. This time, instead of cutting across the map on the train tracks, circle around the lake on the outer banks, starting north first then coming south to circle back to the eastern train tunnel. The outer banks have several Maple and Birch Saplings which you can gather, although you will not need them for Episode Two.
The north ShortwaveTower can be accessed from the west side. Open the Shortwave Tower Box to obtain the Transponder Parts. There is also a wooden Supply Bin nearby.
Then, head south toward the bottom left corner of the map. You can try to cut across the frozen lake, but it would be safer to continue around the outer banks. If you do choose the lake path, stick to areas covered by snowdrifts whenever possible and avoid sprinting across frozen water to prevent getting caught by Weak Ice.
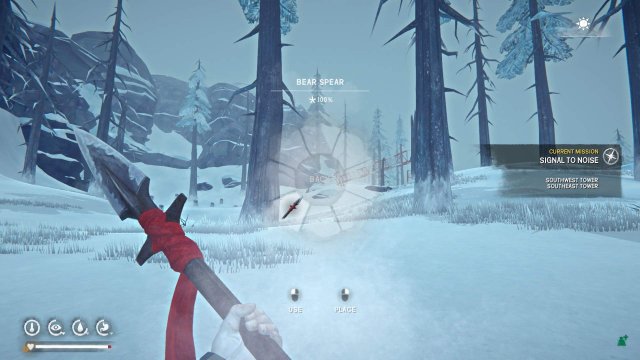
The broken southwest tower is near the Old Spence Homestead. You can access the tower from a path to the southeast. Before you approach the tower, get the Bear Spear ready: once you get close enough, the bear will appear. He will roar, rear up, then rush toward you to attack. Before he reaches you, the Bear Spear must be fully lowered into position (using the fire/attack button). You will have to time your attack so that the spear is ready before the bear reaches you but not so early that you run out of energy to hold the spear.
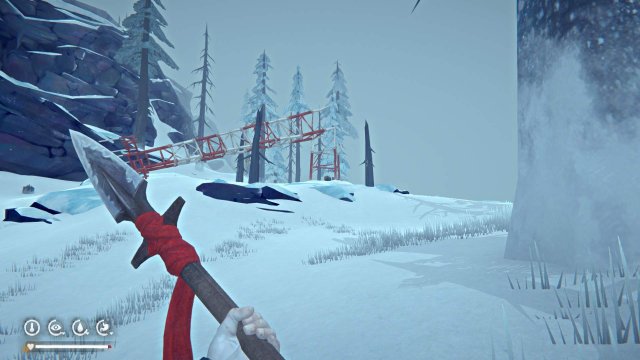
When the bear attacks and you have the Bear Spear in position, you will be able to “Fight Back” just as you would during a Wolf struggle. You won’t be able to win against the bear yet; you just have to hold your own, but performing better during the struggle can limit the damage you receive.
After the struggle, the Bear Spear will be lying on the ground at your feet. Immediately pick up the spear, ignoring any injuries including Blood Loss, and prepare for the bear’s second attack.
Once you defend against his attacks, the bear will leave. The bear may attack two or more times, so wait for Will to remark on the bear’s exit. Treat any Blood Loss immediately, then retrieve the Transponder Parts from the second tower. There are several natural remedy ingredients around this tower in case your medical supply is low.
Before going to the third tower, check your clothes for Condition loss due to the attack. If the Condition is too low, the clothes may become Ruined during the next set of attacks.
Continue along the outer banks past the Old Spence Homestead and the Bunkhouses toward the Mystery Lake train tunnel. The final tower has a tiny path between the mountains with a path leading uphill. There is a flat area with an abundance of deadwood, a gathering of rabbits, and a view to the tower through the trees.
Get the Bear Spear ready. As you approach the tower, you hear the roar of the bear. This time, he will attack until you defend against his attacks again before he leaves. Near this tower is a Backpack with limited supplies and a hollowed tree that is able to shelter a fire. Retrieve the final set of Transponder Parts from the signal tower.
Objective: Bring The Transponders Back To Jeremiah.
Treat any injuries and rest at the Poacher’s Camp to recover your Condition as much as possible before proceeding to the next mission. Once you have treated your injuries, return to the train tunnel leading to Mystery Lake. The moment you try to leave Forlorn Muskeg, the bear will surprise-attack you, and you will be unable to defend yourself.
Everything goes dark.
Задания по выживанию[]
Основы выживания
Квест доступен для выполнения в эпизодах 1 и 2.
Задания можно выполнять в любом порядке.
- Шитьё. Дойти до подлокации Дом в Милтоне или Домики у озера (запад) найти и подобрать книгу «Шитьё для начинающих», и в журнале появится дополнительный квест — научитесь чинить одежду и ухаживать за ней, однажды этот навык спасет вам жизнь. Нужно сшить или починить 3 детали одежды.
- Сбор трав. Дойти до подлокации Почтовое отделение или ГЭС «Картер» найти и подобрать книгу «Целебные растения Дикого медведя» и в журнале появится дополнительный квест — найдите и соберите целебные растения Великого медведя. Нужно собрать: шиповник 72 шт., гриб Рейши 6 шт., старый висящий мох 9 шт. и приготовить: чай из шиповника 3 шт., чай Рейши 3 шт., повязка из старого висящего мха 3 шт.
- Поймать кролика в капкан. Дойти до подлокации Ферма «Райские луга» или Охотничий домик найти и подобрать книгу «Разделка туши в полевых условиях, том 1», и в журнале появится дополнительный квест — поймать кролика в капкан. Когда вы возьмете книгу или капкан в инвентарь, разблокируется рецепт изготовления капкана. После поимки кролика (забирать кролика из капкана не обязательно) откроется дополнительный крафт вещей из кроличьей шкуры — шапка и варежки.
Школа выживания
Квест доступен для выполнения в эпизоде 2.
Задания можно выполнять в любом порядке.
- Охота. Дойти до подлокации Безымянный пруд, взять в засидке книгу «», и в журнале появится дополнительный квест — научитесь охотиться и убивать оленей. Нужно убить оленя в любом месте. Задание будет засчитано, и откроется дополнительный крафт вещей из оленьей шкуры — штаны и обувь.
- Рыбалка. Дойти до подлокации Администрация турбазы, найти книгу «Замерший рыболов» и в журнале появится дополнительный квест — научитесь делать удочки и выловите в Загадочном озере немного рыбы. Получение этого задания разблокирует рецепты изготовления удочки, крючка и лески. Однако, ловля рыбы доступна и до получения этого задания. Снасти можно найти в металлическом контейнере под стойкой ресепшена или изготовить тут же на верстаке. Для выполнения задания достаточно поймать около 3 крупных рыбин. С собой нужно иметь металлический инструмент для расчистки проруби.
- Отстрел волков. Дойти до подлокации Лагерь браконьеров, в вагоне взять книгу «», и в журнале появится дополнительный квест — восстановите баланс экосистемы, сократите популяцию волков. Нужно убить трех волков на локациях — Загадочное озеро 1 шт., Одинокая топь 1 шт., Разбитая железная дорога 1 шт. после выполнения данной части квеста откроется возможность крафтить волчью шубу.
Лучшие гайды – к вашим услугам!
Гайд – это полезное описание какого-либо предмета или же своеобразный путеводитель по виртуальной среде (в данном случае – TLD), который помогает не только выжить, но и преодолеть разные неурядицы.
Иногда весьма полезно и разумно использовать его, так как после изучения мироощущение компьютерного творения перейдет на совершенно новый уровень. Пособие по игрушке составить, в общем-то, тяжело, а уж тем более сотворить годный гайд по выживанию в The Long Dark. Не нужно думать, что это вредный материал, поскольку это полная глупость.
Изучение гайдов, наоборот, прибавляет навыков и делает времяпрепровождение более приятным. Также оно облегчает решение загадок, сокращает время на поиск полезных ресурсов и т.д. В проигрыше в данном случае лишь те, кто не додумался воспользоваться столь универсальным источником.
Следует только остерегаться подделок и откровенного ширпотреба. Подобной некачественной ерундой перепичкан весь Интернет. Действительно хороший текстовый продукт вы без проблем отыщете на нашем сайте, причем не только для игры The Long Dark: здесь представлены подсказки, тактические решения и советы по различным RPG, хоррорам и другим жанрам индустрии.