Sorcerer
Содержание:
Skills and Abilities
The tables below list base damage and tiers as they’re shown in the guild hall.
As an example, the first upgrade for Lay on Hands can be bought at a Tier 2 guild hall.
Every upgrade to a skill costs , which are shown in the upper-right corner of the screen while in town.
| Paladin skills | ||||||
|---|---|---|---|---|---|---|
Sword (Primary Attack)
Melee attack that deals in an arc covering X degrees.
Paladin primary attack speed is 0.3 seconds.
| Upgrades | Base | Tier 1 | Tier 2 | Tier 3 | Tier 4 | Tier 5 |
|---|---|---|---|---|---|---|
| Damage | 16 | 19 | 22 | 25 | 28 | 31 |
| Arc | 90 | 120 | 150 | 180 | 210 | 240 |
| Star Cost | N/A | 3 | 4 | 5 | 6 | 8 |
Charge (Skill 1)
Dash forward. Enemies in your path take physical damage. Upgrades increases the dash speed and range.
T5 Charge travels twice as far as T0 dash. Charge does not travel through enemies unless it deals lethal damage. Any enemies hit by a non-lethal Charge will be stunned for 0.5 seconds.
| Upgrades | Base | Tier 1 | Tier 2 | Tier 3 | Tier 4 | Tier 5 |
|---|---|---|---|---|---|---|
| Damage | 25 | 35 | 45 | 55 | 65 | 75 |
| Mana Cost | 10 | 13 | 16 | 19 | 22 | 25 |
| Star Cost | N/A | 3 | 4 | 5 | 6 | 8 |
Lay on Hands (Skill 2)
An active ability that heals the Paladin and nearby allies along with providing a 25% chance to block some magical damage for a few seconds.
| Upgrades | Base | Tier 1 | Tier 2 | Tier 3 | Tier 4 | Tier 5 |
|---|---|---|---|---|---|---|
| Heal Rate | N/A | N/A | 3+2% | 5+2% | 7+2% | 9+2% |
| Mana Cost | N/A | N/A | 30 | 40 | 50 | 60 |
| Amount Blocked | N/A | N/A | 5 | 10 | 15 | 20 |
| Duration | N/A | N/A | 3 | 3.5 | 4 | 4.5 |
| Star Cost | N/A | N/A | 5 | 6 | 8 | 10 |
Whirlwind (Skill 3)
A spinning attack that deals physical damage to nearby enemies and lasts for a few seconds.
While spinning your shield still faces toward the direction you’re aiming, and you are still able to use your primary to attack.
| Upgrades | Base | Tier 1 | Tier 2 | Tier 3 | Tier 4 | Tier 5 |
|---|---|---|---|---|---|---|
| Damage | N/A | N/A | N/A | 30 | 40 | 50 |
| Seconds | N/A | N/A | N/A | 3 | 4 | 5 |
| Mana Cost | N/A | N/A | N/A | 50 | 60 | 70 |
| Star Cost | N/A | N/A | N/A | 7 | 9 | 12 |
Shield (Passive 1)
The Paladin’s most signature feature is the shield, which blocks most incoming projectiles in an arc in front of the player, and has a 25% chance to block some physical damage.
The shield is still able to be used while using Whirlwind, and will point toward the direction aimed.
| Upgrades | Base | Tier 1 | Tier 2 | Tier 3 | Tier 4 | Tier 5 |
|---|---|---|---|---|---|---|
| Arc | 60 | 80 | 100 | 120 | 140 | 160 |
| Reduction | 5 | 10 | 15 | 20 | 25 | |
| Star Cost | N/A | 2 | 3 | 4 | 5 | 6 |
Stunning Blows (Passive 2)
The Paladin has a chance to stun the enemy for 2.5 seconds.
| Upgrades | Base | Tier 1 | Tier 2 | Tier 3 | Tier 4 | Tier 5 |
|---|---|---|---|---|---|---|
| Chance | N/A | N/A | 10 | 15 | 20 | 25 |
| Star Cost | N/A | N/A | 4 | 5 | 6 | 8 |
Flames of Devotion (Passive 3)
Adds 1 per stack to all of your skills’ damage with each primary attack.
Includes the Paladin’s Sword. Each stack lasts 1 second.
| Upgrades | Base | Tier 1 | Tier 2 | Tier 3 | Tier 4 | Tier 5 |
|---|---|---|---|---|---|---|
| Maximum Stacks | N/A | N/A | N/A | N/A | 12 | 24 |
| Star Cost | N/A | N/A | N/A | N/A | 10 | 15 |
Unlocks
| Rank | Prestige Total | Master At Arms | Blacksmith | Apothecary | Magic Shop | Tavern | Chapel | General Store | Anvil | Gold/XP Bonus | ||||
|---|---|---|---|---|---|---|---|---|---|---|---|---|---|---|
| PRIVATE | 3 | Armor | 4 | Potion Charges | 2 | Common Drinks | Common | 3 | ||||||
| Weapon | 4 | Healing Draught | 2 | Uncommon | 2 | |||||||||
| Critical Chance | 2 | Mana Draught | 2 | |||||||||||
| Boots | 2 | Invigorating Spices | 1 | |||||||||||
| Mana Extractor | 1 | |||||||||||||
| CORPORAL | 50 | 6 | Armor | 6 | Potion Charges | Max | Resistance | 2 | Common Drinks | Tier 1 | Common | 3 | Common Items | +30% |
| Weapon | 6 | Healing Draught | 3 | Skill Damage | 2 | Uncommon Drinks | Uncommon | 2 | ||||||
| Critical Chance | 3 | Mana Draught | 3 | Skill Crit Chance | 1 | |||||||||
| Critical Damage | 1 | Invigorating Spices | 2 | |||||||||||
| Boots | 3 | Mana Extractor | 2 | |||||||||||
| SERGEANT | 200 | 9 | Armor | 8 | Potion Charges | Max | Resistance | 4 | Common Drinks | Tier 1 | Common | 3 | Common Items | +45% |
| Weapon | 8 | Healing Draught | 4 | Skill Damage | 4 | Uncommon Drinks | Uncommon | 2 | Uncommon Items | |||||
| Critical Chance | 4 | Mana Draught | 4 | Skill Crit Chance | 2 | Rare Drinks | Rare | 1 | ||||||
| Critical Damage | 2 | Invigorating Spices | 3 | Skill Crit Damage | 1 | |||||||||
| Boots | 4 | Mana Extractor | 3 | |||||||||||
| LIEUTENANT | 500 | 12 | Armor | 10 | Potion Charges | Max | Resistance | 6 | Common Drinks | Tier 1 | Common | 3 | Common Items | +60% |
| Weapon | 10 | Healing Draught | Max | Skill Damage | 6 | Uncommon Drinks | Tier 2 | Uncommon | 2 | Uncommon Items | ||||
| Critical Chance | Max | Mana Draught | Max | Skill Crit Chance | Max | Rare Drinks | Rare | 1 | Rare Items | |||||
| Critical Damage | Max | Invigorating Spices | Max | Skill Crit Damage | 2 | |||||||||
| Boots | 5 | Mana Extractor | Max | |||||||||||
| CAPTAIN | 1000 | 15 | Armor | Max | Potion Charges | Max | Resistance | Max | Common Drinks | Tier 1 | Common | 3 | Common | +75% |
| Weapon | Max | Healing Draught | Max | Skill Damage | Max | Uncommon Drinks | Tier 2 | Uncommon | 2 | Uncommon | ||||
| Critical Chance | Max | Mana Draught | Max | Skill Crit Chance | Max | Rare Drinks | Rare | 1 | Rare | |||||
| Critical Damage | Max | Invigorating Spices | Max | Skill Crit Damage | Max | |||||||||
| Boots | Max | Mana Extractor | Max | |||||||||||
| MAJOR | 2500 | 18 | Armor | Max | Potion Charges | Max | Resistance | Max | Common Drinks | Tier 1 | Common | 3 | Common | +90% |
| Weapon | Max | Healing Draught | Max | Skill Damage | Max | Uncommon Drinks | Tier 2 | Uncommon | 2 | Uncommon | ||||
| Critical Chance | Max | Mana Draught | Max | Skill Crit Chance | Max | Rare Drinks | Tier 3 | Rare | 1 | Rare | ||||
| Critical Damage | Max | Invigorating Spices | Max | Skill Crit Damage | Max | |||||||||
| Boots | Max | Mana Extractor | Max | |||||||||||
| COLONEL | 5000 | 21 | Armor | Max | Potion Charges | Max | Resistance | Max | Common Drinks | Tier 1 | Common | 3 | Common | +105% |
| Weapon | Max | Healing Draught | Max | Skill Damage | Max | Uncommon Drinks | Tier 2 | Uncommon | 2 | Uncommon | ||||
| Critical Chance | Max | Mana Draught | Max | Skill Crit Chance | Max | Rare Drinks | Tier 3 | Rare | 1 | Rare | ||||
| Critical Damage | Max | Invigorating Spices | Max | Skill Crit Damage | Max | |||||||||
| Boots | Max | Mana Extractor | Max | |||||||||||
| GENERAL | 10000 | 24 | Armor | Max | Potion Charges | Max | Resistance | Max | Common Drinks | Tier 1 | Common | 3 | Common | +120% |
| Weapon | Max | Healing Draught | Max | Skill Damage | Max | Uncommon Drinks | Tier 2 | Uncommon | 2 | Uncommon | ||||
| Critical Chance | Max | Mana Draught | Max | Skill Crit Chance | Max | Rare Drinks | Tier 3 | Rare | 1 | Rare | ||||
| Critical Damage | Max | Invigorating Spices | Max | Skill Crit Damage | Max | Tier 4 | ||||||||
| Boots | Max | Mana Extractor | Max |
Statue Blueprints
 From left to right: Bolgarth, Calis, Cedric, Ewran, Kyra, Ozreth, Phalarath, Wylmir
Statues and their blueprints are new with the DLC and give the player extra bonuses during their attempts at killing or Nerys. They cost increasing amounts of to upgrade and act as an infinite ore sink so long as the player can continue to get higher and higher level blueprints to upgrade their statues. The blueprints (orange in color) appear on any act and floor in the Pyramid of Prophecy campaign, however unlike blueprints for the Magic Anvil statue blueprints don’t appear for every player, nor are the blueprints the same statue or tier. They are entirely individual, so keep a look out on the map for your own blueprints when playing in multiplayer as no one can help you look for them.
The blueprints do indicate what statue they upgrade, but because of the small image, it can be difficult to tell at a glance.
Statue blueprints can generally be found up to 3 tiers above the current New Game level the player is on. While not impossible to get higher tiers, it shouldn’t be relied on. This encourages the player to continue delving into the pyramid at higher difficulties.
Shops
Shops can be found on the second or third floor of any Act in the tower and can only spawn once per act. In the Pyramid of Prophecy Shops can spawn on any floor, as there are no Red Rooms, skip portals, in the Pyramid.
Each shop has 5 items and can contain 2 more if you have have a or have the Abundant Shops fortune from the Fountain.
These can both stack giving 9 item choices at a single shop. At any given shop you can only purchase 3 of the items shown. drink allows to purchase an additional one.
It is rare, but you can sometimes find duplicate items in the shop, usually if you pick up Fancy Plume after looking at the shop the first time, or if you bought it from the shop. Note that if you already have an item, you can NOT buy it from the shop again. If an item is both on the floor and in the shop, you must therefore buy the item first, then pick it up off the ground to have both. Duplicate items like this DO count towards set bonuses, unlike attuning.
The will reduce the prices of items in the shops by 25%. drink will increase the cost by 50% (only in dungeons).
The shops in each act give varying qualities of items. The following is the rarities that the shops can give in each act. Note that they have a chance to not give any items of the highest tier.
- Act 1: Common
- Act 2: Common, Uncommon
- Act 3: Common, Uncommon
- Act 4: Common, Uncommon, Rare
- Act 5: Common, Uncommon, Rare
Fancy Plume adds items to the shop based on the item rarities that are already in the shop. Not what it could potentially have. For example, If a shop in act 5 doesn’t have any rare items and only has uncommon items, when the Fancy Plume is added to your inventory none of the extra items added to the shop will be rare.
Stats
The player starts off at level 1. Every time the Ranger levels up, stat boosts are gained.
To get stats at a given level, use the equation «X = scaling * (level-1) + Level_1_stat»
| Attribute values by level | ||||||
|---|---|---|---|---|---|---|
| Attribute | Health | Mana | Health Regen | Mana Regen | Armor | Resistance |
| Level 1 | 50 | 50 | 0.5 | |||
| Scaling per Level | +6 | +6 | +0.025 | +0.075 | +0.5 | +0.2 |
| Level 2 | 56 | 56 | 0.025 | 0.575 | 0.5 | 0.2 |
| Level 3 | 62 | 62 | 0.05 | 0.65 | 1 | 0.4 |
| Level 4 | 68 | 68 | 0.075 | 0.725 | 1.5 | 0.6 |
| Level 5 | 74 | 74 | 0.1 | 0.8 | 2 | 0.8 |
| Level 10 | 104 | 104 | 0.225 | 1.175 | 4.5 | 1.8 |
| Level 15 | 134 | 134 | 0.35 | 1.55 | 7 | 2.8 |
| Level 20 | 164 | 164 | 0.475 | 1.925 | 9.5 | 3.8 |
| Level 25 | 194 | 194 | 0.6 | 2.3 | 12 | 4.8 |
| Level 30 | 224 | 224 | 0.725 | 2.675 | 14.5 | 5.8 |
Upgrades, Costs, Effects
| Tier 1 | ||
|---|---|---|
| Building | Cost | Effect |
| Town Hall | Unlocked by default | |
| Treasury | Unlocked by default. 50% tax rate at 10000 total gold | |
| Guild Hall | Unlocked by default. Upgrade your skills to Tier 1 | |
| General Store | 5 | Buy keys and items (3 common) |
| Blacksmith | 5 | Buy upgrades to your weapons (primary attack) and armor |
| Ore Trader | 5 | Buy and sell ore |
| Apothecary | 5 | Buy upgrades for your potion |
| Fountain | — | — |
| Chapel | — | — |
| Tavern | — | — |
| Magic Shop | — | — |
| Tier 2 | ||
|---|---|---|
| Building | Cost | Effect |
| Town Hall | 5 | Unlocks the next tier of Town Hall upgrades |
| Treasury | 20 | 50% tax rate at 15000 total gold |
| Guild Hall | 10 | Upgrade your skills to Tier 2 |
| General Store | 10 | Buy keys and items (2 common, 1 uncommon)Prices are 5% cheaper |
| Blacksmith | 10 | Buy upgrades to your weapons (primary attack) and armor |
| Ore Trader | 10 | Buy and sell ore. Better trade rates |
| Apothecary | 15 | Buy upgrades for your potion and pickup effectiveness |
| Fountain | 10 | Throw gold in the Fountain to afford different fortunes |
| Chapel | 15 | Unlocks Priest. Donate money to receive a permanent blessing |
| Tavern | 10 | Unlocks Thief. Adds gambling. Buy up to 3 drinks |
| Magic Shop | — | — |
| Tier 3 | ||
|---|---|---|
| Building | Cost | Effect |
| Town Hall | 20 | Unlocks the next tier of Town Hall upgrades |
| Treasury | 40 | 50% tax rate at 20000 total gold |
| Guild Hall | 30 | Upgrade your skills to Tier 3 |
| General Store | 25 | Buy keys and items (3 common, 1 uncommon)Prices are 10% cheaper |
| Blacksmith | 25 | Buy upgrades to your weapons (primary attack) and armor |
| Ore Trader | 30 | Buy and sell ore. Better trade rates |
| Apothecary | 35 | Buy upgrades for your potion and pickup effectiveness |
| Fountain | — | — |
| Chapel | 35 | Donate money to receive a permanent blessing |
| Tavern | 20 | Buy up to 4 drinks. Increased stockpile limit for drinks |
| Magic Shop | 30 | Unlocks Wizard. Buy upgrades to your skills and resistance |
| Tier 4 | ||
|---|---|---|
| Building | Cost | Effect |
| Town Hall | 40 | Unlocks the next tier of Town Hall upgrades |
| Treasury | 80 | 50% tax rate at 25000 total gold |
| Guild Hall | 60 | Upgrade your skills to Tier 4 |
| General Store | 50 | Buy keys and items (2 common, 1 uncommon, 1 rare)Prices are 15% cheaper |
| Blacksmith | 50 | Buy upgrades to your weapons (primary attack) and armor |
| Ore Trader | — | — |
| Apothecary | — | — |
| Fountain | 25 | More fortunes to select from |
| Chapel | — | — |
| Tavern | 40 | Buy up to 5 drinks. Increased stockpile limit for drinks |
| Magic Shop | 60 | Buy upgrades to your skills and resistance |
| Tier 5 | ||
|---|---|---|
| Building | Cost | Effect |
| Town Hall | 80 | Unlocks the next tier of Town Hall upgrades |
| Treasury | 160 | 50% tax rate at 30000 total gold |
| Guild Hall | 120 | Upgrade your skills to Tier 5 |
| General Store | 100 | Buy keys and items (2 common, 2 uncommon, 1 rare)Prices 20% cheaper |
| Blacksmith | 100 | Buy upgrades to your weapons (primary attack) and armor |
| Ore Trader | — | — |
| Apothecary | — | — |
| Fountain | — | — |
| Chapel | 135 | Donate money to receive a permanent blessing |
| Tavern | — | — |
| Magic Shop | 120 | Buy upgrades to your skills and resistance |
| Tier 6 | ||
|---|---|---|
| Building | Cost | Effect |
| Town Hall | 160 | Unlocks the next tier of Town Hall upgrades |
| Treasury | — | — |
| Guild Hall | — | — |
| General Store | 200 | Buy keys and items (3 common, 2 uncommon, 1 rare)Prices 20% cheaper |
| Blacksmith | 200 | Buy upgrades to your weapons (primary attack) and armor |
| Ore Trader | — | — |
| Apothecary | — | — |
| Fountain | — | — |
| Chapel | 250 | Donate money to receive a permanent blessing |
| Tavern | — | — |
| Magic Shop | 200 | Buy upgrades to your skills and resistance |
Secret Areas[]
- SPECIAL NOTE: During Act Three, there are multiple instances where buttons and cracked walls are used simply to open up shortcuts between different areas of the map, or to reveal the main path. These are very easy to notice, and therefore will not be mentioned here.
- Floor 7
- Behind the first silver door, a button will open a passage to a chest located south of this area.
- Below the first arrow trap, a button opens a small alcove with a few coins right above the room containing a Strange Plank, to the right of the floor entrance.
- A fake wall can be seen above and to the left of the second save point.
- Past the third save point, a button behind a Silver Door, next to a Vitality Shop, opens up the previously mentioned room containing a Strange Plank.
- Floor 8
- NOTE: An area at the top right corner of this floor, containing an arrow trap and a closed off room with a chest and items, can only be reached after beating Act Three’s Bonus Area, which is accessed from the next floor. This will be adressed alongside the secrets on Floor 9.
- A button above a Demon Eye Miniboss and to the left of a Flower Tower reveals the entrance to the Fire Trap room on the far right, containing an Offense Shop.
- A button near the bottom of the map, behind a Silver Door, reveals the entrance to an area down south, containing arrow traps, enemies and a Strange Plank.
- A button inside the fake wall above the Flower Tower opens a path to the room with the Strange Plank.
- Floor 9
- A button located southeast of the Vitality and Defense Shops, behind a copper door and next to a Flower Tower, opens a path to that same shop area.
- A fake wall on the southwest corner of the shop area allows access to the Vendor Coin seen next to the Vitality Shop.
- On the left side of the map, a long Copper Door reveals two secrets once opened:
- On the right corner, a button opens a secret room just north of it;
- On the left corner, a cracked wall reveals a «vault room» above it, similar to the ones seen in Act Two.
- Within the vault room, a cracked wall opens a path to a room containing coins and a chest.
- On the top left corner of this path, another cracked wall opens a path to a room to the left of the northwest Fire Trap area.
- Within the vault room, a cracked wall opens a path to a room containing coins and a chest.
- A button next to a Wisp Spawner, within an area containing a Flower Tower and an arrow trap, reveals a path to an area down below, containing multiple enemies.
- Directly to the right of this room, in an area containing a Demon Eye Miniboss, there are two buttons, which teleport both the Gold Key and the Golden Ankh to the room over. The Golden Ankh can then be accessed through a fake wall on the bottom right corner.
- A button on the right-side exit of the east Fire Trap opens a large area down to the right, containing a Boss Room Activation Node.
- Bonus Area
- There are several steps to unlocking the Bonus Area on Act Three. First, the player must activate five buttons throughout Floor 9:
- To the left of the east Fire Trap area, next to a few Demon Eye Spawners and a Copper Key;
- Above the Fire Trap area, next to a Wisp Spawner;
- On the top left corner of the Fire Trap;
- Right next to the previous button, a cracked wall opens the room above, containing a Vendor Coin and another button;
- On the top left corner of the area containing the Boss Room Activation Node, next to a Copper Key.
Activating all five buttons will open a room to the right of the Fire Trap area, containing a «Simon Says» type puzzle. Completing it will reveal a path to the Bonus Area Portal, near the location of the 5th button.
- Beating the Bonus Area will open up — and teleport you to — an area previously inaccessible on the northeast corner of the same floor, containing a couple of chests, a bomb puzzle, and a door back to Floor 8.
- Completing the bomb puzzle creates a floating path to the Golden Ankh located above the Combo Shop.
- Taking the door down to Floor 8 will land you at the beginning of the arrow trap on the northeast corner of this floor, where multiple things can now be accessed:
- A Strange Plank can be obtained directly south of the entrance.
- The button next to the door reveals a long corridor above the arrow trap, giving access to a room with a chest, a pickup item and a Golden Ankh.
- There are several steps to unlocking the Bonus Area on Act Three. First, the player must activate five buttons throughout Floor 9:
Richard Hammer’s Barrel Drinks
Richard the bartender is unlocked with the Tavern by default, and will allow you to purchase drinks that you have found in barrels throughout the Tower. Barrels will contain multiple charges of whatever drink you are given, depending on the rarity and the NG level you are playing on. Uncommon drinks can be found on NG+1 and above and rare drinks on NG+2 and above.
| Common | Uncommon | Rare | |
|---|---|---|---|
| Barrel | |||
| Max stacks | 32 | 24 | 16 |
| Cost if empty | 500G | 2,000G | 5,000G |
Common Drinks
Common drinks are found in any level as long as you have the tavern unlocked.
| Image | Drink | Effect |
|---|---|---|
| |
The Groovy Ghost | +8% Evasion,-15 Attack Power. |
| Smelly Old Man | +2 Mana Regen,-10% Base HP | |
| On the Run | +0.4 Movement Speed,-25% Gold Gain. | |
| Miner’s Delight | +100% Ore Gain,-75% Gold Gain. | |
| Mind Control | Immune to confusion,All other debuffs last 100% longer. | |
| Mellow Mist | -10% Damage Taken,-0.4 Movement Speed. | |
| Lazy Stroll | +50% Experience Gain,-0.4 Movement Speed. | |
| Lady’s Blessing | +2HP Regen,-15 Skill Power. | |
| Enchanted Slammer | +10 Physical damage on Primary Attack,Primary attack costs 2.5% of your current mana. | |
| Crazy Eye | +10% Primary Critical Hit Chance,-20 Armor. | |
| Ancient Spirit | +20 Skill Power,-10 Resistance. | |
| A Strong Arm | +25 Attack Power,-15 Armor. | |
| A Fool’s Errand | +100% Gold Gain,HP regen set to 0. | |
| Snake Blood | Immune to Poison -25% Health gained. |
Uncommon Drinks
Uncommon drinks are found in New Game Plus 1 (NG+1).
| Image | Drink | Effect |
|---|---|---|
| The Safe Bet | +20% Armor and Resistance,-5 Luck. | |
| The Outlook Special | Ore pickups trigger a 50% damage reduction for 30 seconds,-50% ore gain. | |
| The Last Sin | +100% Skill Critical Damage, -33% Mana Regen. | |
| The Hairy Magus | You gain 1% of your current mana when scoring critical hits with skills,+25% skill cost. | |
| The Cranky Clergyman | +25 Resistance,-25% Skill speed. | |
| Starlight Stinger | +15% Skill Critical Chance,-25% Base Mana. | |
| Slumbering Giant | +50 Attack power,-20% attack speed. | |
| Primal Fury | +33% attack speed in combo,No mana regen in combo. | |
| Overflowing Physique | +50% base Health,Lose 5% of your current Mana while moving. | |
| Last Stand | +30% Damage Output Damage Reduction when standing still,+10% damage taken while moving. | |
| Homemade Hazard | +100% Primary Critical Damage,+10% Damage Taken. | |
| Elemental Bruiser | +75% Skill Damage,+50% Skill Costs. | |
| Double Thriller | +75% Damage Dealt,+25% Damage Taken. | |
| The Smirking Shopkeep | You can buy an additional item in dungeon shops. Items cost 50% more in dungeon shops. |
Rare Drinks
Rare drinks are found in New Game Plus 2 (NG+2).
| Image | Drink | Effect |
|---|---|---|
| Wicked Sickness | +200% Damage dealt during combo,-50% damage dealt out of combo. | |
| Unbalanced Essence | +100 Skill Power,Lose 10% of current mana when casting a skill. | |
| The Mad Proposal | +400% Damage dealt,Gain a permanent state of Vertigo. | |
| Stab In The Dark | 50% chance to score a Critical Hit on Primary Attack,Darkness effect for 1.5 seconds when using your Primary Attack. | |
| Spilled Blood | Primary Attack applies bleeding,-20% base Health. | |
| Perpetual Desire | All pickups (coins, ore, mana crystals) activate combo,+100% skill cost out of combo. | |
| Markham’s Moonshine | +5% damage per item in your inventory. Spheres count twice,Combo is disabled. | |
| Kinetic Kiss | Gain 2.5% of your max Mana while moving,Lose all your Mana when taking damage. | |
| Incendiary Demise | +40 magical damage on primary attack,Set on fire when hitting enemies with primary attacks. | |
| Hammer Time | +100 Attack Power,Lose 5% of current HP while standing still. | |
| Frenetic Eruption | 5% chance of triggering Combo on critical hits,+20% damage taken out of Combo. | |
| Evil Infusion | 5% Lifesteal on skills,Lose 10% of current HP when casting a skill. | |
| Crimson Death | +5% Lifesteal on primary attacks,Lose 2.5% of current health while moving. | |
| Caustic Touch | Damage dealt by skills also applies poison,You become poisoned when casting a skill. |
| Wiki Navigator | |
|---|---|
| Classes | Paladin • Priest • Ranger • Sorcerer • Thief • Warlock • Wizard • Gladiator • Witch Hunter |
| The Outlook | Apothecary • Bestiary • Blacksmith • Chapel • Companions (pets) • Fountain • Guild Hall • General Store |
| Magic Shop • Magic Anvil • Ore Trader • Town Hall • Tailor • Tavern | |
| Forsaken Tower | Chests • Encounters • Items • Puzzles & Secrets |
| City of Stone | Pyramid of Prophecy • Arena • Retired Gladiator • Statues |
| Path of Sorrow | Legacy shop |
| Mechanics | Acts • Combat • Leveling Up • Money • New Game Plus • Mercenary mode • Completion Rewards |
| Enemies | Bosses • Aberrations • Beasts • Constructs • Undead |
| Modding | Commands • Packager • Starting a mod • Editor • Custom language files |
| Custom Materials (Dyes) • Effect File • Custom Items • Custom assets • Custom Shops • Custom sounds and music | |
| Uploading to the workshop • My Mod Was Marked as Incompatible!? | |
| Misc | Lore • Voice Lines • Patch Notes • Troubleshooting |
Multiplayer/Lobby commands
| Multiplayer/Lobby commands | |
|---|---|
| lobby_members | Write a list of all lobby members to the console. |
| lobby_kick | Kick a player from the lobby. Only works if you’re the host. Takes 1 parameter, the lobby member ID. Get the ID using *lobby_members*. |
| lobby_say | Send a chat message via the console. |
| g_multiplayer_limit | Set this value to some higher value than 4 before opening the «create lobby» menu to allow hosting lobbies with more than 4 players. |
| g_multiplayer_ping_limit | When clients get disconnected, they have this many seconds for their connection to be restored before they are automatically kicked. |
| g_pure | Must be set in the config file, default value is 1, by setting to 0 allows multiplayer with unpacked mods, you’ll only see players with the same pure settings as your own. |
Skills and Abilities
The tables below list base values and tiers as they’re shown in the guild hall.
As an example, the first upgrade for Branding Ward can be bought at a Tier 2 guild hall.
Every upgrade to a skill costs skill points, which are denoted as stars in the upper-right corner of the screen while in town.
| Witch Hunter skills | ||||||
|---|---|---|---|---|---|---|
| Repeater Crossbow | Flaming Hounds | Branding Ward | Witch Pyre | Fanatic Zeal | A Murder of Crows | Searing Torch |
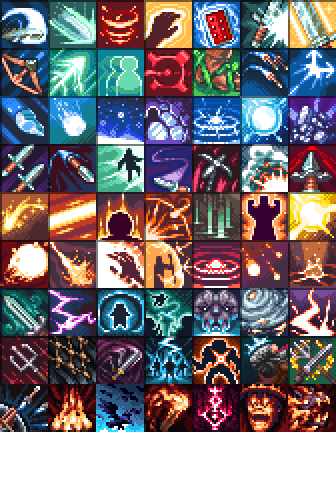 |
Repeater Crossbow (Primary Attack)
Fires 4 bolts in quick succession. Each bolt deals that ignores armor.
Bolts pierce enemies but lose 50% damage with each enemy pierced.
Every upgrade increases the base damage and the amount of armor ignored.
Witch Hunter primary attack speed is 0.9 seconds.
| Upgrades | Base | Tier 1 | Tier 2 | Tier 3 | Tier 4 | Tier 5 |
|---|---|---|---|---|---|---|
| Damage | 5 | 8 | 11 | 14 | 17 | 20 |
| Armor Ignored | 5 | 10 | 15 | 20 | 25 | 30 |
| Star Cost | N/A | 3 | 4 | 5 | 6 | 8 |
Flaming Hounds (Skill 1)
The Witch Hunter unleashes a Flaming Hound that bounces five times in a forward direction.
The hound explodes when bouncing dealing , which is increased by 50% with each bounce.
| Upgrades | Base | Tier 1 | Tier 2 | Tier 3 | Tier 4 | Tier 5 |
|---|---|---|---|---|---|---|
| Damage | 10 | 15 | 20 | 25 | 30 | 35 |
| Mana Cost | 20 | 25 | 30 | 35 | 40 | 45 |
| Star Cost | N/A | 3 | 4 | 5 | 6 | 8 |
Branding Ward (Skill 2)
Places a ward on the ground that triggers when enemies get close.
Enemies hit by the ward take and are branded.
Branded enemies take 100% more damage.
| Upgrades | Base | Tier 1 | Tier 2 | Tier 3 | Tier 4 | Tier 5 |
|---|---|---|---|---|---|---|
| Damage | N/A | N/A | 40 | 60 | 80 | 100 |
| Duration | N/A | N/A | 3 | 4 | 5 | 6 |
| Max Wards | N/A | N/A | 4 | 6 | 8 | 10 |
| Mana Cost | N/A | N/A | 40 | 45 | 50 | 55 |
| Star Cost | N/A | N/A | 5 | 6 | 8 | 10 |
Witch Pyre (Skill 3)
Places a pyre on the ground that last for 7.5 seconds.
Enemies that hit the pyre ignite an explosion dealing .
Enemies close to the pyre also start burning.
The pyres have their own Health, Armor, and Resistance that scales with the level of the skill and character skill power.
| Upgrades | Base | Tier 1 | Tier 2 | Tier 3 | Tier 4 | Tier 5 |
|---|---|---|---|---|---|---|
| Health | N/A | N/A | N/A | 300 | 500 | 700 |
| Armor | N/A | N/A | N/A | 10 | 20 | 30 |
| Resistance | N/A | N/A | N/A | 10 | 20 | 30 |
| Damage | N/A | N/A | N/A | 40 | 80 | 120 |
| Mana Cost | N/A | N/A | N/A | 65 | 90 | 115 |
| Star Cost | N/A | N/A | N/A | 7 | 9 | 12 |
Fanatic Zeal (Passive 1)
Generates stacks of Fanatic Zeal when casting a skill.
Each stack increases critical hit chance for all attacks and skills by 2.5%.
Fanatic Zeal stack number and duration scale with the level of the skill.
| Upgrades | Base | Tier 1 | Tier 2 | Tier 3 | Tier 4 | Tier 5 |
|---|---|---|---|---|---|---|
| Stacks | N/A | 4 | 5 | 6 | 7 | 8 |
| Duration | N/A | 4 | 5 | 6 | 7 | 8 |
| Star Cost | N/A | 2 | 3 | 4 | 5 | 6 |
A Murder of Crows (Passive 2)
Unleashes Crows when taking damage that defend the Witch Hunter.
Cooldown reduced per level.
| Upgrades | Base | Tier 1 | Tier 2 | Tier 3 | Tier 4 | Tier 5 |
|---|---|---|---|---|---|---|
| Crows | N/A | N/A | 5 | 7 | 9 | 11 |
| Cooldown | N/A | N/A | 10 | 9 | 8 | 7 |
| Star Cost | N/A | N/A | 4 | 5 | 6 | 8 |
Searing Torch (Passive 3)
Throws a torch towards a random nearby enemy when casting a skill.
The torch explodes on impact dealing and apply burning.
| Upgrades | Base | Tier 1 | Tier 2 | Tier 3 | Tier 4 | Tier 5 |
|---|---|---|---|---|---|---|
| Damage | N/A | N/A | N/A | N/A | 60 | 120 |
| Star Cost | N/A | N/A | N/A | N/A | 10 | 15 |
Guild Titles
Your guild is leveled up by completing guild achievements. Upon leveling up your guild level, you gain various amounts of gold, ore, and 3 permanent skill points (stars) to spend on upgrading your character’s skills.
These skill points will be available to even brand new level 1 characters and are cumulative.
To achieve the final guild title requiring 2M fame, you would need to acquire almost every achievement in the game. Expect to spend countless hours and hundreds of runs to achieve it.
| Guild Title | Fame Required | Cumulative Skill Stars | Gold Awarded | Ore Awarded |
|---|---|---|---|---|
| Unknown | x | x | ||
| Recognized | 2,500 | 3 | 5K | 5 |
| Acknowledged | 10,000 | 6 | 10K | 10 |
| Respected | 25,000 | 9 | 20K | 15 |
| Memorable | 50,000 | 12 | 30K | 20 |
| Prominent | 100,000 | 15 | 50K | 25 |
| Distinguished | 200,000 | 18 | 70K | 30 |
| Famous | 325,000 | 21 | 100K | 35 |
| Acclaimed | 500,000 | 24 | 150K | 40 |
| Illustrious | 700,000 | 27 | 200K | 45 |
| Celebrated | 1,000,000 | 30 | 300k | 50 |
| Glorious | 1,500,000 | 33 | 400K | 55 |
| Exalted | 2,000,000 | 36 | 500K | 60 |
Differences from normal Characters
Mercenaries start at level 20 with 25,000 gold. This gold is separate from your town’s gold. Each Mercenary has their own personal NG progression. They also start with a Mercenary-specific Companion.
Mercenary characters have the same base stats and scaling as non-mercenary characters, however they only have access to the primary attack of that class and this can’t be changed.
They can use the resources of your town, but with some limitations. Some aspects are limited by Mercenaries rank, with more being made available as you rank up, and other aspects are not available to mercenaries (such as statues).
Mercenaries can only play Multiplayer with other Mercenaries.
Curse
Curse is a new mechanic that was introduced with the DLC, and is exclusive to the Pyramid campaign. It increases the chance that the player will entirely miss an attack and that any damage the player takes will be a critical hit, dealing (200+curse)% damage to the player. At lower amounts, curses can be negligible as they player still hits often enough, and unless a pyramid trap (rolling boulder or falling pillar) gets crit the player rarely has to worry about the curses. The rate at which the player loses accuracy slows the more curse the player gets, but can continue all the way to 100%. The only way to reach a curse this high is to sit on a trap that gives curse or let one of the Big Mummy miniboss or attack the player for a long time.
Reducing Curse
The main method of reducing curse is by rousing the djinn found in Midway, and the . The djinn in Midway reduces curse by 3, on act 3 floor 1 by 5, floor 2 by 7, and floor 3 by 9. There are random numbers of djinn on the floors in act 3. More on the djinn in the section.
The next way to reduce curse are by picking up honey bottles and the . These lower the player’s curse by 1, and every bottle is individual like items, where if one player picks up a bottle, a different player can still pick it up, so that there is no fighting over who gets the bottles.
Another way to remove curse is with the . The Imp has a chance, so long as the player has any curse (visible or not) to remove ALL of the player’s curse.
The last way to lower the player’s curse is by obtaining items from the set. This set raises the 0 point for your curses, allowing you to have negative curses. Having curses below 0 does not grand any benefits besides having 0 curse, and ability to take extra curse at no determent until the player reaches the number of curses reduced by the set bonus.
Act 1, Desert
Before you can enter the pyramid, you have to get there first. To reach the pyramid you will have to travel through 3 large desert maps, each with a shop that you can buy a map piece and one item from. The map piece is the same for everyone in multiplayer, so only 1 person should buy it.
The map piece dictates which way is the safest to travel through. This path is the only path that will not spawn a great threat when you enter the map. Unlike in the Forsaken Tower the great threat in the desert will never end so long as you’re in the map. It spawns a few sandstorms that follow the player around and will slow the player down if they get too close to it. Additionally they summmon sand elementals that charge at you and deal contact damage. In NG2(?) if they collide with the player, the player get stunned for a moment. If there are many elementals hitting the player in turn, the player can be in a state of near stun-lock.
The different desert patterns
The desert also has its own summons as the player walks through it. While moving through the desert, your footsteps occasionally rouse a group of snakes, scorpions, or sand lurkers to appear right under the player. These enemies will never stop following the player, so long as they can reach the area the player is in. If a scorpion group appears, it has a chance to contain massive scorpion that acts as the miniboss of this act. They can drop keys up to Ace, and have a chance to drop items. The sand lurkers have a chance to drop small blue diamonds and when they die, and the quicksand they appear from will slow the player down if they walk into it.
The desert also contains many spawners all over the map that cannot be killed like the ones in the tower, however they will stop spawning enemies after 5 to 8 spawned enemies are killed.
Occasionally there will be a in the desert.
Lastly, on one of the areas in the desert there will be a pattern in the ground. This pattern should be remembered for Act 2, as it will be used there.
Stats
The player starts off at level 1. Every time the Wizard levels up, stat boosts are gained.
What differs the Wizard from most other classes is his high base mana, allowing the casting of many spells in quick succession before a recharge is required.
To get stats at a given level, use the equation «X=scaling*(level-1)+level1stat»
| Attribute values by level | ||||||
|---|---|---|---|---|---|---|
| Attribute | Health | Mana | Health Regen | Mana Regen | Armor | Resistance |
| Level 1 | 35 | 75 | 1.5 | 2 | ||
| Scaling per Level | +4 | +15 | +0.025 | +0.1 | +0.2 | +0.5 |
| Level 2 | 39 | 90 | 0.025 | 1.6 | 0.2 | 2.5 |
| Level 3 | 43 | 105 | 0.05 | 1.7 | 0.4 | 3 |
| Level 4 | 47 | 120 | 0.075 | 1.8 | 0.6 | 3.5 |
| Level 5 | 51 | 135 | 0.1 | 1.9 | 0.8 | 4 |
| Level 10 | 71 | 210 | 0.225 | 2.4 | 1.8 | 6.5 |
| Level 15 | 91 | 285 | 0.35 | 2.9 | 2.8 | 9 |
| Level 20 | 111 | 360 | 0.475 | 3.4 | 3.8 | 11.5 |
| Level 25 | 131 | 435 | 0.6 | 3.9 | 4.8 | 14 |
| Level 30 | 151 | 510 | 0.725 | 4.4 | 5.8 | 16.5 |